
 |
Basics:
Delicious: Emily's New Beginning is one of the "Delicious" series of time management game. A customer's order will appear in a thought balloon over his head, and you play as Emily, serving the customer by preparing the food. For most items, this simple requires clicking on the corresponding food; other food may require several steps. When you encounter a new food that requires more than just one click to prepare it, the game, using a large arrow, will walk you through preparing the item for the first time. This game offers an excellent tutorial before the first level; if this is your first time playing a Delicious game, I recommend playing through the tutorial.
Customers order food and pay for it. When a customer is waiting to pay you will see an image of bills and coins; the coins represent the tip. The higher the customer happiness, the greater the tip. You will know the customer's happiness level by the amount of hearts shown while ordering or waiting to pay, with five hearts being maximum happiness. You will know when a customer is about to loose a heart, as the heart will begin to blink. Hearts can be restored by using entertainers or by a visit from Paige (more about both later). For customer happiness between ecstatic and furious, you will have to pay attention to customer facial expressions.
There are several types of customers, with each restaurant having four different types. When a customer type is encountered for the first time, you will see an information sheet about that type (see image below), telling about the patience and tip levels and how this customer reacts to Paige. This information will help you know which customers you can make wait, which you want to keep happiest for highest tips and when you can let Paige roam.

There are several types of customers, with each restaurant having four different types. When a customer type is encountered for the first time, you will see an information sheet about that type (see image below), telling about the patience and tip levels and how this customer reacts to Paige. This information will help you know which customers you can make wait, which you want to keep happiest for highest tips and when you can let Paige roam.

As you play, you will get to know your customers and their level of patience. The overweight customers (know as "Foodies") and the Senior customers have the most patience and can be made to wait so you can make combos. Kids and college kids ("Hipsters") have the least patience.
Doing the same action twice or three times in a row (chaining) will help you achieve higher scores.
Chains can be earned by having two or three orders prepared on your tray, and serving them to the customers without an interruption* to do another task. Serving two customers gets you the "2 in a row" bonus of +11, while serving three customers gets the "3 in a row" bonus of +16. Chaining can also occur when using the cash register. When you check out two customers at the same time, you get a "2 Combo" for +10, three customers together give a "3 Combo' bonus of +20. Note that this is not two customers in a row, but rather at the same time. When customers are ready to pay, they will stand at the counter; wait until you have two or three waiting to pay and one click of the cash register will take care of them all at once.
*Serving customer orders can be interrupted by using the cash register, and the chain will not be broken.
Tip: Plan to serve complete orders only, as doing this will give you a bonus of +5.
At the beginning of each level, you can choose what to serve in your menu (see example below). You will be shown what percentage of each customer type is expected, and you pick your items accordingly. If a customer orders an item that is preferred, an additional tip will be given.

Certain days have events, which are tasks that need to be performed. If there are multiple parts to the task, a +25 will be added for each completed part. The fully completed event will give a +100 to your score. If you don't complete the task, the level can still be won.
 Paige is Emily's daughter. She has a corner in each restaurant, where she will sit and play with her toys. When she becomes bored, she will begin to wander around the restaurant. If a customer likes Paige, they will gain a heart from her visit; if they do not like Paige, they will loose a heart. (Her influence will be shown on the score at the end of the level; see below.) While Paige is visiting a table, they will pause what they are doing to look at her, making it take longer to decide what to order or to finish the meal. You can not direct Paige to visit a certain table, and she doesn't always follow the same direction when roaming the restaurant. When Paige begins to wander, simply click on her and Emily will pick her up and return her to her spot. Paige has a happiness meter, and when it runs out she will begin to cry. Toys to keep Paige occupied can be purchased in the restaurant store.
 Carl the mouse will appear in each level. He appears for a few seconds, and you'll know he is there by the chittery-mousy sound that happens each time he shows up. You will be rewarded +100 for clicking on him. If you don't find him right away, he will continue to come back until the end of the level. A screenshot has been provided for each level to show Carl's location.
Shop Item money is earned for completing the level, with additional amounts earned for achieving two or three stars. This money is used to by upgrades, items for Paige and entertainers.
Tip: The first restaurant can be successfully completed without upgrades, so use your money to buy Paige's toy upgrades first. Once purchased, these toys last through the entire game and do not need to be purchased again in later restaurants.
Entertainers can be purchased in the shop item store. Once purchased, the entertainer remains for all the levels in that restaurant. A new entertainer is available for each restaurant. To use an entertainer, click on the entertainer and then the table you want the entertainer to visit. The entertainer will play for a few seconds and then that table will gain a heart. This is especially helpful when you have a table waiting at the cash register so that you can have two or three tables pay at the same time for the bonus.
Tip: Unlike many of the Delicious games, the entertainers in Emily's New Beginning take a long time to entertain, making it not as valuable a purchase as it is in other games.
Note: Using an entertainer will not prevent a customer from loosing a heart.
There are 18 Memorable Moments to be collected. These happen in the story scenes before and after the game levels. A camera will appear and you simply click on the camera to capture the moment. You can view them in the scrapbook.

Trophies:
Trophies, in the form of characters in a picture, can be earned for different achievements. Most of the trophies are self explanatory from their description and most can be earned simply by playing all the way through the game on the normal setting.


Brigid is earned when, you have to have played with every food item in the game. If you have not earned this by the time you complete the game, go to the last level of
each restaurant and choose the opposite of every food you used
previously for that level.
To earn the Foodies you need to have a "3 customer bonus two times in a row". To do this, have three customers at your counter and check them out all together, then do it again immediately with the next three customers. You may need to use the entertainer to keep your customers from getting angry and leaving while you are doing this.
To earn the Foodies you need to have a "3 customer bonus two times in a row". To do this, have three customers at your counter and check them out all together, then do it again immediately with the next three customers. You may need to use the entertainer to keep your customers from getting angry and leaving while you are doing this.
To get Julie, the violinist, you need to have purchased every item in all of the item shops. To be able to do this, you have
to have achieved all three stars on all levels so that you can earn enough money
to buy all the shop items.
For tips on Sid the cleaner, see level 1-3.
For tips on Sid the cleaner, see level 1-3.
For Kate, you need to locate 10 "hidden items". These are items that you'll be finding to complete tasks for in certain levels. For example, in level 1-6 you have to find 8 blocks. In level 5-3, you have to find 8 pieces of the potato head toy. Once you've found a total of 10 of any of these items across the restaurants, Kate will pop up as being unlocked.
For Edward ("knock, knock") you need to knock three times
on the door in the Patio restaurant.


Walkthrough:

Level 1-1
In this level you have only three items to prepare. The hamburger is made by clicking on each piece individually. As the levels progress, there will be more parts to it.
Emily will have to clean her own tables in this and the next level. To do so, simply click on the dirty table and Emily will walk to it and clean it. Customers will not sit at a dirty table, so you much clean them to get more customers.
Tip: You don't have to wait until the customers have left to clean a table. An exclamation point will appear over the table when a customer goes to check out, leaving the others at the table. As soon as the exclamation point appears, you can clean the tables--even if there are still customers seated at the table.
Mouse location:

Level 1-2
Mouse location:

Level 1-3
Sid the cleaner appears on this level. To have him clean the table, simply click on the dirty table and he will go and clean it.
Your hamburger or bagel now has another ingredient option, so pay attention to the customer's order.
Your hamburger or bagel now has another ingredient option, so pay attention to the customer's order.
This level contains your first task (see below). For Emily to prepare the decoration, simply click on the exclamation
point. You will see the percentage rise as she works on it. Clicking on food or the register will interrupt Emily and she will do the other task. Click back on the decoration for her to return to it.
Tip: have Emily work on the decorations in between customers and while you are waiting on multiple customers to make a chain.

In this level you will have to pick fruit to make pies. Picking the fruit from the tree (see arrow in screenshot) will cause it to disappear; it will slowly grow back. You can have a stack of seven at a time. To make a pie, click first the pie crust, then the fruit beside it. The pie will automatically go into the oven. The oven will beep when the pie is done. Be quick to get it, or the pie will burn.
Tip: This is a good level to unlock Sid the Cleaner
trophy, for burning ten items but still completing the level with three stars.
Mouse location:

Level 1-4
Mouse location:

Level 1-5
Your hamburger or bagel now has a yet another ingredient option.
Francois will wait for a pie at the door (see below); don't make him wait too long or he will leave.

The mouse can be difficult to spot, if customers are in the way.
Mouse location:

Francois will wait for a pie at the door (see below); don't make him wait too long or he will leave.

The mouse can be difficult to spot, if customers are in the way.
Mouse location:

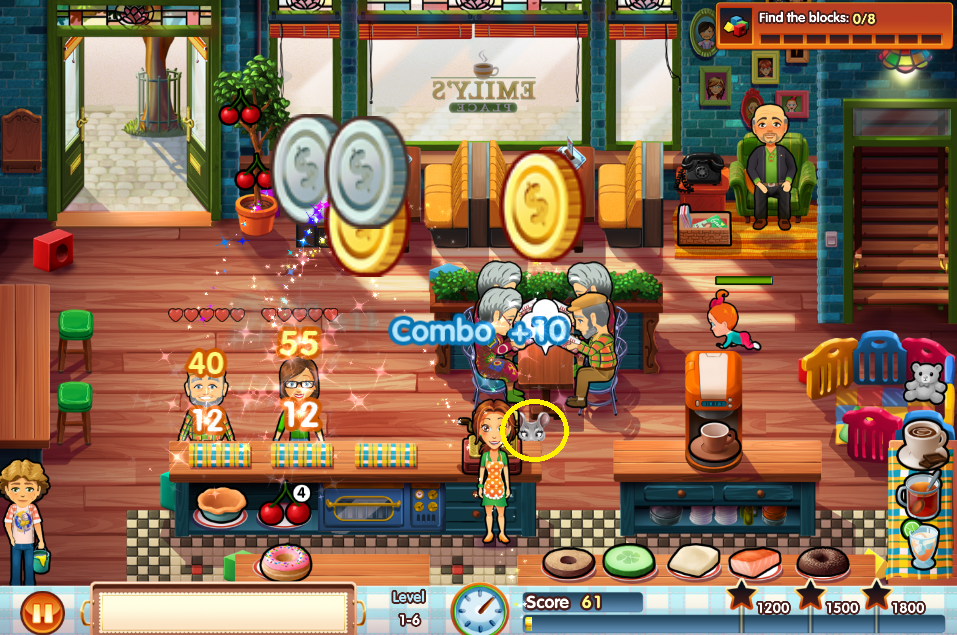
Level 1-6
Your task in this level is to find the hidden blocks.
Block locations:

Mouse location:
Level 1-7
Your task this level is to retrieve Paige six times. Simply let her wander, click on her and then Emily will bring her back.
Mouse location:

Level 1-8
Your task for this level is to hand Edward his tools when he asks for them. Tool locations shown below.
Mouse location:

Level 1-9
Paige is gone from this level, so that you don't have to watch out for her.
Mouse location:

Level 1-10
Mouse location:
Mouse location:

Level 1-10
Mouse location:


Level 2-1
Pizzas are made just like the pies were; they will burn if left in the oven too long.
Emily will have to clean her own tables again for this and the next level.
Mouse location:

Level 2-2
Mouse location:

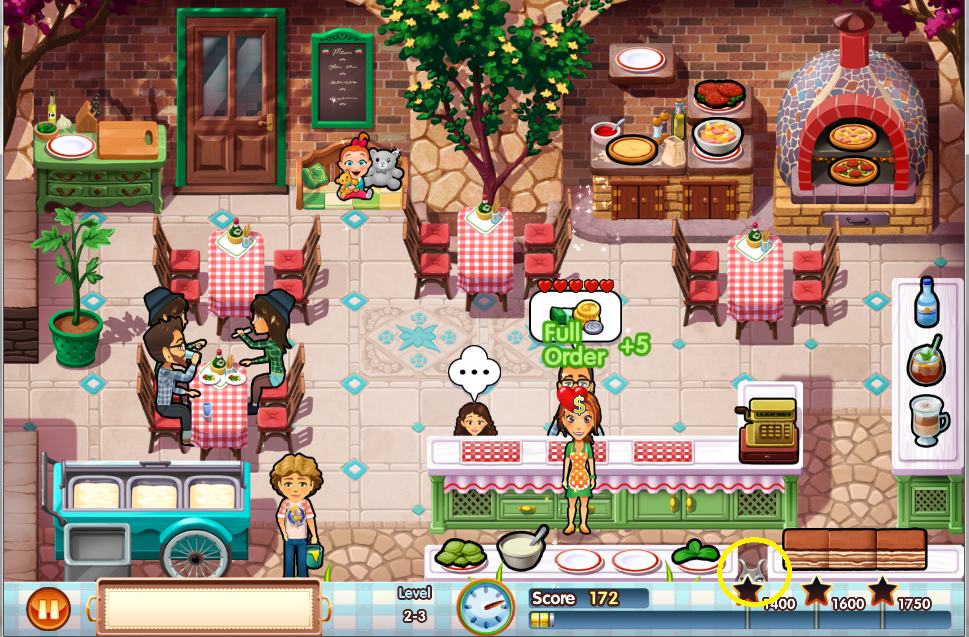
Level 2-3
A non-burning oven is now available in the item store.
Tip: If you plan one keeping a pizza in the oven, beware as it is easy to click on the wrong pizza.
Tip: If you plan one keeping a pizza in the oven, beware as it is easy to click on the wrong pizza.
Sid the cleaner has joined Emily.
Mouse location:

Mouse location:
Level 2-4
Paige is gone from this level.
Gelato is introduced in this level. Note that you will have to click three times to make the three scoops.
Mouse location:

Level 2 5
Your task for this level is to quickly clean the tables. When a customer leaves, a counter starts, letting you know how much longer you have to get the table cleaned.
Beginning with this level, there is a vegetable to be picked (see arrow in screenshot below); it will combine with bread at the table in the back left. You can store up to five vegetables.
Tip: Don't worry if it seems that you aren't going to reach 3 stars; the bonus at the end for getting all the
tables clean will most likely give the points you need.
Mouse location:

Mouse location:

Level 2-6
There are now three choices for pizza toppings.
A third flavor of gelato has been added, so now a cone could have one of each flavor.
Mouse location:

Level 2-7
Paige is absent from this level.
Mouse location:

Mouse location:

Level 2-8
Mouse location:

Level 2-9
Your task this level is to feed the hipsters one food at a time
for eight times.
Tip: Don't make chains including this table, as you won't get credit for their orders in a two-in-a-row chain.
Mouse location:

Level 2-10
Mouse location:

Tip: Don't make chains including this table, as you won't get credit for their orders in a two-in-a-row chain.
Mouse location:

Level 2-10
Mouse location:


Tip: pay close attention to teas and sandwiches. Some of them resemble each other enough to be mistaken if you only glance at the order.


Level 3-1
In this restaurant, the chicken will lay eggs in the grass and you will need to gather them. You can have a maximum of five eggs on hand.
Keep an eye on your frying eggs, as they will burn if left too long.
Keep an eye on your frying eggs, as they will burn if left too long.
Mouse location:

Level 3-2
Your task for this level is to pick daisies. They pop up at random and will disappear if you don't pick them within a few seconds. They are large and easy to spot (see screenshot for example).
Sid the cleaner is available from this level.
Mouse location:

Level 3-3
Beginning in this level, you will need to pick fruit to make jam and syrup. Like with the fruit in the first restaurant, you can hold a maximum of five at a time, and it will regrow on the tree/bushes.
You will need to clean the dirt spots. Click on the spot to clean,then click on your menu item to interrupt cleaning for serving food.
Jam and syrup are now available; to make one, click first on the container, then on the type of fruit.
Jam and syrup are now available; to make one, click first on the container, then on the type of fruit.
Mouse location:

level 3-4
There are now two types of fruit to pick (tree
and bush).
Bread for sandwiches will need to be baked; you can store a maximum of five. It will burn if left in the oven too long.

Level 3-5
In this level, you need to inflate the bouncy castle; this is done the same way as the previous tasks.
Mouse location:

Mouse location:

Level 3-6
In this level you Dainton and Richard have to be fed, as well as a party. As with other feeding tasks, if you include their food in a chain, you won't get credit for towards a bonus. Because you are feeding two tables, you have only one table for customers; you'll need to be quick with that table to free it up for the next customers.
Mouse location:


Level 3-7
A third fruit is introduced in this level (see screenshot below).
Your task is to have 25 happy customers pay for their items. If you haven't yet purchased the entertainer, now would be a good level to do so.
Mouse location:

Mouse location:

Level 3-8
Mouse location:

Level 3-9
Mouse location:

Level 3-10
Mouse location:


Level 4-1
To stock the items on the left hand counter, ring bell for Dainton (see screenshot below).
Mouse location:

Mouse location:

Level 4-2
To make crepes, click on the crepe and it will begin to cook in the frying pan until the bell dings; it will burn, so be sure to remove it promptly.
Mouse location:

Level 4-3
Mouse location:

Level 4-3
In this level you have clean up Francois' messes seven times; be sure to click on Francois quickly so that you will be able to clean up a total of seven before the end of the level.
Mouse level:

Mouse level:

Level 4-4
Mouse location:

Level 4-5
Mouse location:

Level 4-6
In this level, you must collect boxes from Edward; he will
leave if he has to wait long.
Mouse location:

Mouse location:

Level 4-7
In this level, you need to find the hidden presents; locations circled below.
Mouse location:

Level 4-8
In this level, you need to feed the party. You will have one less table and no
bar stools due to the party. As with the other feeding tasks, chaining their food will not give you any bonus.
Paige is stuck in her high chair and is not roaming during this level.
Mouse location:
Mouse location:

Level 4-9
In this level you will need to clean up the trash from the party. The trash can will ask for a
particular trash item; locate it and click on the trash can to deliver it. (See screenshot for item locations.)
The mouse can be hard to see in this level.
Mouse location:

Level 4-10
Paige is absent today.
Mouse location:

Mouse location:


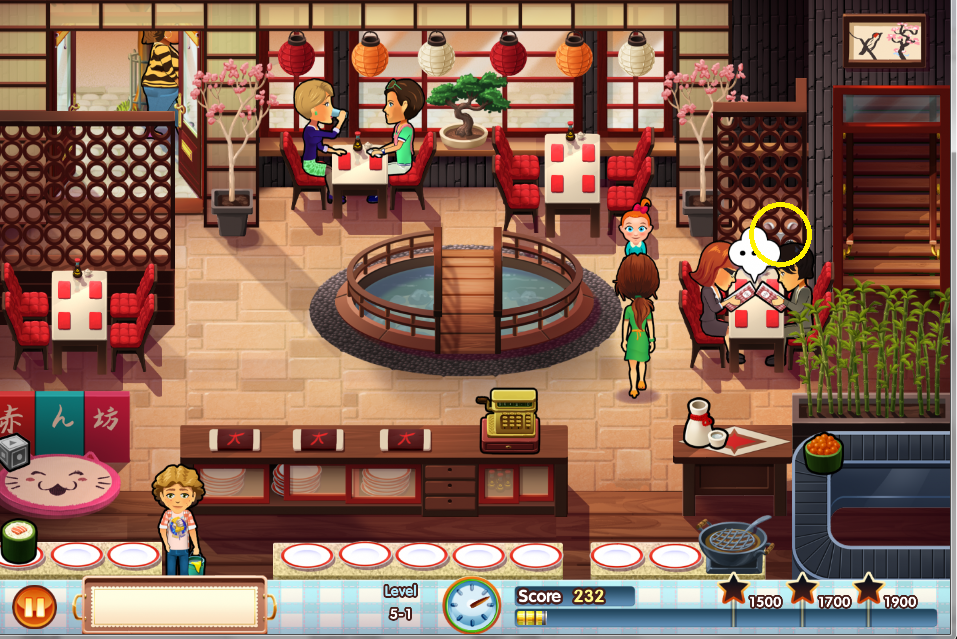
Level 5-1
Dainton will
replenish the food on the conveyor belt without you having to do anything.
Mouse location:

Mouse location:
Level 5-2
Paige is grouchy today, and gets bored and unhappy quicker.
Mouse location:

Mouse location:

Level 5-3
You will now have food to fry; it will burn if left too long.
Your task is to find the pieces of the toy; the locations are circled in the screenshot.
Mouse location:

Level 5-4
Your task is to find the pieces of the toy; the locations are circled in the screenshot.
Mouse location:

Level 5-4
Paige will not roam today.
Mouse location:

Mouse location:

Level 5-5
In this level, you must deliver the food to the critic before Dainton does; a timer will show you how much longer you have to deliver the food. Again, chaining his food won't result in a bonus.
Mouse location:

Mouse location:

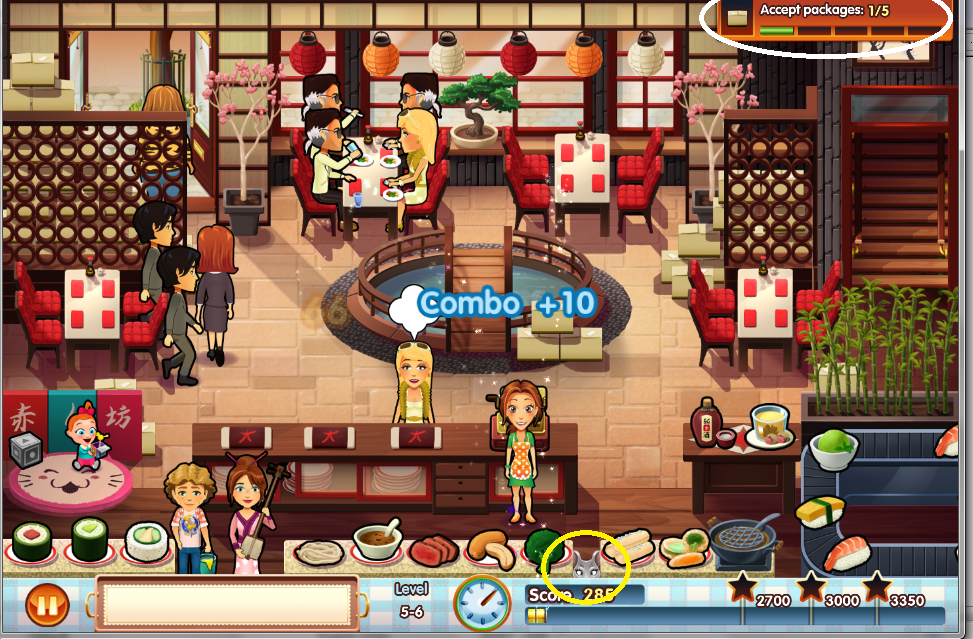
Level 5-6
In this level you need to accept packages; the delivery man will leave if you take too long.
Mouse location:

Mouse location:
Level 5-7
Mouse location:

Level 5-8
Mouse location:

Level 5-9
Mouse location:

Level 5-10
Mouse location:


This restaurant is only available if you purchased the "Premium" version of the game. It will unlock after the credits have finished.
Tip: Don't save your entertainer to purchase until last,
as you might need her to get three stars on the final level.
Level 6-1
Patrick will ask for decorations; find
them and take them to him. Locations marked on the screenshot.
To make soup click on the ingredients next to the bowl. You can stock a maximum of five bowls.
Mouse location:

Mouse location:

Level 6-2
Candles are made by clicking on the candle, then waiting while the meter fills up. Be sure to click the meter when it is in green, or your candle will be ruined. You can do something else while the candle is pouring, just be certain to click on it in time.

Mouse level:


Mouse level:

Level 6-3
Customers can now visit Santa in upper
left hand, so be sure to notice that corner. They can be part of the chain, so plan accordingly.
Mouse location:

Mouse location:

Level 6-4
Mouse location:

Level 6-5
Keep an eye on the meat when you cook it, as it will burn if left too long.
Mouse location:

Level 6-6
Your task is to feed Richard; chaining his food will not give a bonus.
Tip: Wreaths can be tricky now that there are three decorations, pay close
attention to what is on them as they won't necessarily use all three
parts
Tip: Two kinds of candles available now; you
can have them both pouring at the same time.
Mouse location:

Mouse location:

Level 6-7
The cake now has a second possible
ingredient, so look at the order carefully.
Mouse location:

Mouse location:

Level 6-8
Your task is to make Dainton's dessert; click on it to work on it in between making orders and taking payments.
Mouse location:

Mouse location:

Level 6-9
Mouse location:

Level 6-10
Mouse location:

Thank you so much for taking the time to do this. It was extremely helpful.
ReplyDeleteI'm so glad it was! Thank YOU for taking the time to say thanks!
DeleteThank you very much, it was very helpful!
ReplyDeleteI'm so glad it was! Thanks for commenting!
DeleteIt really helps ! Thank you so much !
ReplyDeleteI'm so glad!
DeleteThan you for this walkthrough it made the game much more enjoyable!
ReplyDeleteI'm so glad it helped!
DeleteYes thank you soooo much!
ReplyDeleteI'm so glad it was helpful! This game is the very reason I started this blog -- I had played it many times but still had trouble with a few of the mice. I made a walkthrough for myself, for the next time I played it, and put it up in case it helped someone else. =D
DeleteI can't find a food that should have appeared at level 2-5, the vegetable one, I need it to get Brigid's achievement :(
ReplyDeleteIs it the chive/tomato plant that is not appearing for you? Does it not appear at all?
DeleteI finally got Brigid thanks to the tip of just reversing lvl 10 of each restaurant. Thanks so much! I don't know if anyone else had this problem but it was showing I still need one more item in shop. As soon as I finish Brigid I got the one for having every person. Yet still not showing the character for by all shop items
ReplyDeleteSo glad that helped! I don't remember having any trouble with buying everything, but do make sure you have all the upgrades for Paige and all the entertainers. I don't have it installed right now, so I can't help you any further. So sorry!
DeleteHeeyy it's 2021 so I'm not sure you'll be seeing this but thanks for the walkthrough!! The game's even enjoyable because of you, really, thank you so much!
ReplyDeleteThat is so kind of you! :) This is one of my favorites of the series -- and the reason I started this blog. There was one mouse I never could find, and when I replay it, I have to look at my own walkthrough! LOL
DeleteThank you for taking the time to create this blog! The screenshots make it very easy to spot the mice and other things. :)
ReplyDeleteI'm so glad it's helpful!
DeleteThank you!!!
ReplyDeleteI'm glad it helped!
DeleteThank you for all the tips.
ReplyDeleteI cannot 3 stars at the last level of the game. Please help🙏
I remember having a tougher time on that one, too. Have you bought all the upgrades yet?
DeleteYes😔but I still cannot reach 3 stars
DeleteSorry for taking so long to reply. You've probably gotten three stars by now, but I had never played this game on my current laptop, so I had to play through from the beginning, and I was playing some other games, too. It took me two tries to get three stars, and even then, I was only 20 over the three star score. It's a busy, tough level!
DeleteHere's what I did to get three stars:
-Set the menu so that all the kid-preferred items are chosen. Their hearts go down so quickly, that having the bonus silver coins for an item here and there is really important.
-Have all the upgrades.
-Don't bother using the entertainer. She takes too long to raise the mood and it's just a waste of time.
-Never make the kids wait so that you can get a chain. Serve/check out immediately, no matter what, including the ones in Santa's lap.
-You can let the farmers wait to make chains; they have a pretty good amount of patience.
-Make sure you get the mouse. That 100 points comes in handy!
-Keep an eye on Paige. The farmers don't like her, so if she walks to them, they'll loose a heart, plus you'll loose the time it takes to walk over to her and return her to her mat.
I hope these suggestions make sense and that they will help you!
Can someone tell me order to play Emily games so that the story makes sense??
ReplyDeleteAbsolutely! The ones with stories are in this order:
DeleteTea Garden
Taste of Fame
Holiday Season
Childhood Memories
True Love
Wonder Wedding
Honeymoon Cruise
New Beginning
Home Sweet Home
Hopes and Fears
Message in a Bottle
Christmas Carol
Miracle of Life
Moms vs Dads
Road Trip
I’ve got one called Emily’s big surprise where does that fit in??
DeleteThat is a mobile only game, which I don't play, and as far as I know it is part of the True Love story line.
DeleteOh ok thanks
Deletethanks for the sharing
DeleteOlá, amigo (˶ᵔ ᵕ ᵔ˶)
ReplyDeleteEntão, vou baixar esse jogo. Estou quase terminando o Sally's Salon - um jogo que me divertiu, melhor que PL -, mas já vou dar continuidade na minha maratona Delicious.
Então, esse jogo é bom? Vou me divertir? Posso baixar o jogo sem medo?
Adiantando, obrigada ♡ྀི ₊ Suas dicas me ajudam muito ִֶָ. ..𓂃 ࣪ ִֶָ🦋་༘࿐
This is my second favorite Delicious game! I hope you enjoy it!
DeleteOlá, amigo! Quanto tempo! ദ്ദി(˵ •̀ ᴗ - ˵ ) ✧
DeleteComo está? Bom, estou quase terminando o New Beginning, estou no Wu's Place. Estou me divertindo muito, amigo, adorei esse jogo 🎀💗᪲᪲᪲
Bom, você viu que lançou um novo Delicious? Se chama Delicious Emily's Taste of Truth. Ele possui o design e a jogabilidade iguais ao do remake do 1 - aquele que não tem nada a ver com o original, tirando só algumas comidas -, então provavelmente não iremos gostar tanto. Se dor repetitivo igual o outro, provavelmente irei parar de jogar meio, mas vou dar uma chance. Gosto muito da franquia, e mesmo que estejam fazendo num estilo moderno qual eu não gosto, quero ver mais da Emily.
Como sou membro Zylom, tive acesso ao jogo já.
Mas e você, irá jogar? ⋆˙⟡
I'm glad you're liking this one! It's such fun!
DeleteYes, I've been playing the demo of the new one today. It seems very much like Emily's Cooking and Romance so far. I liked it okay and did like Mystery Mansion, so I'm definitely going to give this one a try through the demo at least. I'll be interested to hear what you think!
I just watched the video advertisement for the game, and there will definitely be the mini games that I hate so much. We'll see how badly they interrupt the game play!
DeleteObrigada pelas palavras, amigo (˶ᵔ ᵕ ᵔ˶)
DeleteEntão, este jogo novo definitivamente está melhor que o remake desse ano, com certeza. Eu tenho o jogo completo, mas joguei apenas quatro fases até agora, mas estou gostando. Os mini jogos que apareceram para mim foram bem poucos e não atrapalharam muito o jogo, mas, como tinha dito, só joguei quatro fases.
Eu nunca joguei os jogos mais recentes da Emliy, joguei somente os bem antigos. O choque das mudanças dos designs e jogabilidade dos jogos foram intensas, e também não posso comparar com o Mystery Mansion ou Cooking and Romance pois não joguei... entretanto, acho que já está melhor que os jogos PL e o remake.
Resumindo: joguei poucas fases, mas até agora estou gostando. Não se compara ao estilo clássico e antigo que eu tanto amo, mas está melhor que o remake. A história sobre a Paige e o uso de celulares está me deixando interessada, quero saber o que vai acontecer. Os mini jogos foram bem menos invasivos - até onde eu joguei.
Até agora, eu recomendaria para você.
Vou jogar mais agora, amigo. Espero que você consiga jogar também ฅ^>⩊<^ ฅ
Meu amigo, que emocionante .·°՞(っ-ᯅ-ς)՞°·.
ReplyDeleteEu terminei o jogo... bom, tirando o restaurante bônus. Mas é tão lindo aquele final, ela deixando o lar onde se passaram todos os jogos. Juro que eu chorei (╥‸╥)
Mas aí veio a continuação, com ela procurando a casa com a Paige aparentando uns 2 anos... achando uma casa nova, no período do Natal ahhhhhhhhh que jogo maravilhoso, que série de jogos maravilhosa. Eu amo os jogos Delicious, me sinto tão bem jogando (˚ ˃̣̣̥⌓˂̣̣̥ )づ♡
Ainda vou terminar o restaurante bônus, mas já queria saber como é o próximo jogo da série. O Home Sweet Home é legal também? Estou ansiosa para jogá-lo 𐙚⋆°。⋆♡
I cried too! It's just such a sweet game!
DeleteI liked Home Sweet Home, too, though I didn't like the story as much. It's fun to play, though the Farmer's Market gets a little stressful sometimes. These particular games just give a happy feeling, don't they?!
Sim, amigo. São jogos aconchegantes... em meio a tantos problemas que preciso passar aqui, jogar Delicious me traz uma sensação de paz e esperança ⸜(。˃ ᵕ ˂ )⸝♡
DeleteEntão, me daria uma sinopse sobre o Home Sweet Home? Sem spoiler. Queria me preparar para o jogo. Não gostou porque a história é como? Sei que cada um tem seus gostos, e você eu somos pessoas diferentes, mas também temos coisas parecidas.
Queria saber sua visão do jogo.
Mesmo que não seja os melhores dos jogos, meu intuito sempre é se divertir com um bom jogo e história.
It's a good game, and is fun to play. It follows the family trying to remodel their new house. Emily meets different people in the neighborhood and works with them in different places. I liked the locations a lot, and for the most part I liked the story, I just wasn't crazy about one character. There is one product you have to make in the Farmer's Market that was stressful for me, but not bad enough to make me not like it. As a matter of a fact, talking about Home Sweet Home makes me want to play it!
DeleteI'll probably go play it right now!
My all time favourite is Message in a Bottle - dont really know why just the vibe of it! Love your walkthroughs - probably wouldnt have played so many without them.
ReplyDeleteI really like it, too! It's my third favorite (Honeymoon Cruise, then New Beginnings, then it.) I agree -- it has a good vibe!
DeleteThanks for the comment! I'm so glad to have been helpful!
My favourite is Message in a Bottle - just love the vibe of it! Have played each one at least 3 times but probably wouldnt have without your walkthroughs - thankyou!
ReplyDeleteIt's definitely one of my top favorites, too! I'm so gald I've been helpful!
DeleteI have tried to get 3 stars on level 5-10. Is there a trick to it. I have tried 3 times. thanks
ReplyDeleteHave you gotten all the upgrades, caught the mouse, and picked out your menu for the customer groups? I remember that it's a tough level, and I think I had to try more than once, but there wasn't any thing special that had to be done. (Sorry I can't help more!)
Deletehaving trouble getting bridget,what does reversing level 10 of each restaurant? thanks Arlene
ReplyDeleteOne way I found to make sure I had used every food item was to go to level ten of each restaurant, then at the menu, pick the item that I didn't use when I played that level previously. So, if I had used hamburgers on level 1-10, I switched to bagels. If I had used tea, I switched to orange soda. That way, I knew that I had used every item for each restaurant.
DeleteI discovered what I have missing to get Bridget. I do not have the option of the vegetable that needs to be picked in restaurant 2 level5. Should i delete my game & reissue it?
ReplyDeleteSo it won't let you chose between the tomato bread and the onion bread? That must be some sort of glitch, but I can't help you with that, I'm sorry to say. You might try contacting GameHouse and asking if there is a way to fix it. I'm not affiliated with them or any of the game developers, so I don't have any knowledge of how to fix a game.
DeleteThought I would share the answer to this. The tomato and onion bread only comes up if you click on the top left side where it says Forecast before level 2-6. They don't show up as presents like the rest of the food. If you click on forecast, you can select tomato or onion bread. And you'll get the Brigid achievement.
DeleteThanks for the comment! I'm sure it will help someone!
DeleteThank you for all of your help. I appreciate the helpful tips etc.
ReplyDeleteYou are so welcome! I wrote the blog to help me with replays and am so glad when it helps anyone else!
DeleteI love this, it's really helpful. I do have one question. To earn the Katie trophy, you need to find 10 hidden items...where and what are these items. I'm only on level 1-6, so I may be asking tis prematurely. I'm sure you aware that in the previous games Delicious there were "special" items hidden throughout the entire game that you had to find...is tat was this is?? I can't find any explanation about it anywhere!! I would appreciate any help on this!! Thank you so much!!!!
ReplyDeleteThe "hidden items" for the Kate trophy are items that you'll be finding to complete tasks for a certain level. For example, in level 1-6 you have to find 8 blocks. In level 5-3, you have to find 8 pieces of the potato head toy. Once you've found a total of 10 of any of these items, Kate will pop up as being unlocked. (I need to update my walkthrough to include this!)
DeleteAnd I'm so glad this walkthrough helps!
Delete