
 |
Note: I only play games on the PC, so I may not be able to
help with other platforms.
help with other platforms.
The Basics
Delicious: Emily's Taste of Fame is a time management game in which you prepare food and serve it to customers. This game contains an excellent tutorial at the beginning of the first level. If you are an experienced player of the Delicious games, you can skip it, but I advise players less familiar with the Delicious games to play through it. Game hints are also provided, to explain new features. These can be turned off in the settings menu.
Note about exiting the game: For some reason, the only way to exit this game is from the menu while playing a level. If you want to exit from the calendar screen, you will need to hit escape, which puts the game in a smaller window, then hit the "X" in the upper right hand corner of the game screen.
Customers order food and pay for it. When a customer is waiting to pay you will see an image of bills and coins; the coins represent the tip. The higher the customer happiness, the greater the tip. Unfortunately, the customers don't have happiness levels shown by a number of hearts next to them as many other games do, so you have to pay attention to customer facial expressions to know how they are feeling. You will know if a customer has maximum happiness (is ecstatic) because there will be a pulsing heart next to his head. If a customer is angry, his face becomes red. If he becomes furious it is shown by a storm cloud; a furious customer needs to be served immediately or he will leave and you will be penalized -50. .Customers will become impatient and pay lower tips if they have to wait in line behind other customers for too long.
 Trophies
Most trophies will be earned simply by playing through the game, Here are a few exceptions.
The Panda: Walk 150 miles. You will need to replay some levels to achieve this one.
Break an Egg: Gather all the eggs on one day. See Mo's Farm, Day 2 for a tip.
Show-Biz Burner: Entertain all the customers on a single day. See Betty's Drive Thru, Day 7 for a tip.
?????? "Unlocking this trophy will require you to. .. " See Snuggford Fair, Day 1 for a tip.
Triple Cash Combo Blast: See Betty's Drive Thru, Day 1 for a tip.
 GameHouse Objects
There are 10 GameHouse objects hidden throughout the game. If you find all ten, you will receive "the GameHouse Bang" trophy. These items are found in the following levels: Betty’s Drive Thru, Day 4; Betty’s Drive Thru, Day 7; Mo’s Farm, Day 5; Mo’s Farm, Day 7; Mo’s Farm, Day 9; Charles’ Candy Shop, Day 5; Charles’ Candy Shop, Day 8; TV Studio, Day 1; Snuggford Fair, Day 3; Snuggford Fair, Day 6. A screenshot of the location of each item will shown in the walkthough below.

Betty's Drive Thru
Betty's Drive Thru: Day 1
To prepare the burger, click on each piece in order from left to right.
Emily will have to clean the tables today. To clean a table, click on the dirty table and she will walk to it and clean it. Customers won't sit at a dirty table, so you will need to keep them clean to get more customers.
Tip: You don't have to wait until the customers have left to clean a table. An exclamation point will appear over the table when a customer goes to check out, leaving the others at the table. As soon as the exclamation point appears, you can clean the tables--even if there are still customers seated at the table.
Be mindful of the drive-through orders. They will appear above the speaker. To deliver the order, click on the speaker when the order is complete. If you deliver the order before the customer reaches the window, you will get a +50 bonus and the customer will leave money in the window; using the register will pick up the cash. You can leave the money sitting and wait until you have another customer at the register, so as to make a combo. This is a good way to get the "Triple Cash Combo Blast" trophy. If you deliver the food to the customer waiting at the window, you will have to collect their money right then, just as if it were a counter customer.
Mouse location:

Betty's Drive Thru: Day 2
Today's task is to accept the eight packages. When Bill the mailman arrives, a doorbell noise will sound. Click on him for Emily to walk to him and accept the package. Don't wait to long to go to him, or he will leave.
Mouse location:

Betty's Drive Thru: Day 3
Betty is now available to clean tables.
To make waffles, click on the batter bowl. The batter will go into the griddle and sizzle. A bell will ding when the waffle is done. Don't let it cook too long or it will burn. You can cook two waffles at the same time and you can have a maximum of eight in your stack.
To serve a waffle, click on the cooked waffle, then on the appropriate topping.
Mayor Maggie looses her pearls on this level. Click on them to return them too her.
Pearl locations:

Mouse location:

 Betty's Drive Thru: Day 4
This level introduces "pourable" food. To make the milkshake, click on the banana on the milkshake machine; when the meter's arrow is in the green, click on the machine again. If you wait too late, and the arrow is in the red, you will spill the shake and have to start all over.
This level contains a GameHouse item. Location is shown below.
Your task for this level is to prepare food for Ludwig. Orders will be called out to Emily from the telephone. You must prepare those orders and deliver them to the mailman before the timer runs out. Including these orders in a combo with a regular customer order will not result in the combo point bonus.
Mouse location and GameHouse item location:

 Betty's Drive Thru: Day 5
The task for today is to repair the broken table. Click on the table an Emily will begin to work on it. As she works, the bar fills up, showing the progress. You can interrupt Emily at any time by clicking on a food item or the register. Continue to send Emily back to the table between customers until it is finished.
Mouse location:

 Betty's Drive Thru: Day 6
Today's task is to follow Francois around for photos. When he stops walking, click on him and Emily will walk over to him. You must do this quickly; if you wait too long, Francois will say "too late" and you'll fail the task.
Mouse location:

Betty's Drive Thru: Day 7
This level contains a GameHouse item. Location shown in screenshot below.
Elvis is now available to entertain customers. To entertain a table, first click Elvis, then the table you want him to entertain. Entertaining customers will increase their happiness by one level. If you have a table of angry customers, you will need to entertain several times to bring them up to happy.
Tip: Since the restaurant is not very busy yet, this is a good level to earn the Show-Biz Burner trophy for entertaining every table.
Betty is flustered today, and keeps dropping her cleaning cloth when she goes to clean tables. When this happens, click on the dropped cloth. She will pick it up and return to her place. You will have to click on the table again for her to go and clean it.
Mouse location/GameHouse item location:

 Betty's Drive Thru: Day 8
The task for this level is to perform the Heimlich on Bill the mailman. Click when the moving bar is in the center green area to successfully perform it. You will need to do this six times. If you miss, you will go back down a level. This mini game can be tricky, but just keep trying.
Mouse location:


Betty's Drive Thru: Day 9
Emily is tired today, so chocolates are provided to give her an energy boost. When she gets tired during the day, click on the chocolates, and she will eat one and speed up. You can also have her eat one without her being tired. If you don't use them all by the end of the day, you fail the task.
Customers can now sit on the stools at the counter. They can be entertained if need be.
Mouse location:

Betty's Drive Thru: Day 10
There are chocolates available again today. She'll not request one, so you can have her eat one at any time or not at all.
There are two tasks today. One is to give Mo the tools he requests and the other is to have Betty clean the rug when Mo gets it dirty. The location of the tools is shown below. To clean the rug, just click on it and Betty will walk over to it.

Mouse location:

 Mo's Farm
Mo's Farm: Day 1
To make milk products, click on the churn. After one turn churning, click and you will have a bottle of milk. After two turns churning, click and you will have porridge (or whey?). After three turns churning, click and you will have butter. You will see the items sitting on the stool as they are produced. Just have Emily keep churning until the right product is reached. Each product uses one level of the milk. To refill the milk, click on the cow. Emily will walk to her and begin to milk her. You can interrupt the milking at any time by clicking on a food item or the cash register.
Emily will have to clean tables today.
Mouse location:

Mo's Farm: Day 2
Today's task is to comfort Belle the cow. She won't produce any milk until she is calm, but customers won't order any milk products until she does produce. To calm her, click on her and Emily will walk over and begin to soothe her. Continue to do this throughout the day.
Eggs are now available. The hen will cluck and then you'll hear a plopping sound as the egg is laid. Click on it to pick it up. It will go to your tray, so only pick them up if you need them. The eggs will only stay on the grass for a short time before disappearing.
Tip: There is a trophy (Break an Egg) to be earned for picking up all the eggs on one level. This is a good level to do this, as the restaurant is still rather slow. Just delete it from your tray (by clicking on it on the tray) right after you pick it up so that you'll not fill up your tray.
Emily still has to clean the tables, so plan accordingly.
Mouse location:

Mo's Farm: Day 3
Today's task is to find the blueberries. Locations are marked below.

Apples are now available. They will grow on the tree, three at a time. To pick them, click on one and Emily will pick them. They will regrow. You can stock a maximum of 12.
Tashi will clean tables now.
Mouse location:

 Mo's Farm: Day 4
Today's task is to feed the party. Take them all the food requested before the meter runs out. Including these orders in a chain will not result in a combo bonus.
Jam is now available. To make jam, first click the jar and then the apple.
It takes two apples to make jam.
Mouse of location:

 Mo's Farm: Day 5
Today's task is to chase the dog. When he stops at a location, click on him to send Emily over to him. If you don't do this quickly, you will fail the event. After you complete the task, he will be available to act as entertainer.
To make a pie, click on the pie plate (located in the oven) and then the apples. It takes three apples to make one pie. It will then be available as four slices. The pie will not make any particular sound to let you know when it is baked, but will blink. You must pay attention to the pie, because if you leave it too long, it will burn.
There is a GameHouse item hidden in this level.
Mouse location/GameHouse item:

Mo's Farm: Day 6
Today's task is to serve six golden eggs. When the hen lays one (there will be a special noise to let you know), pick it up and give it to the next customer to order an egg.
Note: If you have a regular egg and a golden egg on your tray, the regular egg will be served first.
Cherries are now available and are used the same way as the apples.
Mouse location:

Mo's Farm: Day 7
Today's task is to accept the packages. When the delivery man arrives, click on him and Emily will get the package. If you wait too long, the delivery man will leave.
A GameHouse item will be in this level. The hen will lay an orange egg with white polka dots somewhere on the farm. This is what it looks like:

Mouse location:

Mo's Farm: Day 8
Today's task is to fill Charles' milk bucket. When he brings the bucket, click on it and Emily will walk to it and begin to fill it. The bucket will flash green when it is full; click on it then. If you click too soon or too late (when the bucket is red), you'll fail the task.
Mouse location:

Mo's Farm: Day 9
Today's task is to talk to Francois. The doorbell noise will sound and an exclamation point will appear over his head. Click on him and he'll reminisce.
There is a GameHouse item located in this level. Location is marked below.
Mouse location/GameHouse item location:

Mo's Farm: Day 10
Today's task is to train Tashi how to run the farm. Tashi will ask Emily a question such as "can you teach me how to prepare jam?". When she does, send Emily to do whatever Tashi requests.
Tip: If the milk container is full when she asks Emily to milk the cow, you'll need to use up some milk first.
Mouse location:

 Charles' Candy Shop
Charles' Candy Shop: Day 1
Emily will have to clean tables today.
Customers can order one, two or three gumballs. Gumballs are prepared by clicking on the gumball machine. One click gives a bag a one, click a second time and a second gumball will go in the bag and click a third time for a third gumball.
To refill the candy jars, click on Charles and he'll walk to them and refill them. The jars can hold a maximum of three pieces.
Mouse location:

Charles' Candy Shop: Day 2
Emily will have to clean tables today.
To make the candy apples, click on the ingredients from left to right. (More ingredients will be available later.)
The task for today is to catch up with the twins. When one of them stops, click on them and Emily will catch her. Don't wait too long to chase the twins or you will fail the task.
Mouse location:
![]()
Charles' Candy Shop: Day 3
Emily is still cleaning tables today.
The task today is to make Emily walk 1000 yards. To do this, have her walk from table to table (by clicking on any table, empty or full) in between preparing food.
To refill the cakes, just click on the oven. It will beep when the cake is done--don't leave it too long or it will burn--and will refill your stack to three cakes.
Mouse location:

Charles' Candy Shop: Day 4
Today's task is to collect the packages from the mailman. Click on him when he comes into the store and Emily will receive the package. Don't wait too long to click on him or the mailman will leave and you'll fail the task.
Charles will clean the tables from now on. He will still fill the candy jars, too.
There are two candy choices for apples now, so pay attention to your order.
Mouse location:

Charles' Candy Shop: Day 5
 Today's task is to answer the questions asked by Ted the reporter, and serve him his requests. He will request food three times and ask three questions. (Including his food in a serving chain does not result in the combo bonus.) Here are the three questions with correct answers:
"I heard you learned how to run a restaurant from your Uncle Antonio." Yes.
"You're stranded here because your car broke down, right?" No.
"Your friend Francois usually travels with you, right? Is it true you've decorated ten restaurants together?" No.
Note: If you wait too long to serve him or answer his questions, you will fail the task.
Cookies are now available and are restocked like the cakes. Note that when you click on the oven to restock, it bakes both and refills both cake and cookie to a stack of three.
There is a GameHouse item hidden in this level. Location is marked below.
Mouse location/GameHouse item location:

Charles' Candy Shop: Day 6
Today's task is to fix the tables. Click on the table and Emily will begin to repair it. Click on any food item or the cash register to interrupt her. Keep sending her back to the tables in between customers. You will want to repair them quickly so as to have enough tables for customers.
There is now another topping option for the candy apples, so look closely at the order.
Francois is available as an entertainer now.
Mouse location:

Charles' Candy Shop: Day 7
Today's task is to stack the boxes. This is done the same way as the CPR task in Betty's Drive Thru: Day 8. Click when the moving bar is in the center green area to successfully stack a box. You will need to do this six times. If you miss, you will go back down a level. It can be enormously frustrating, but keep trying. You can interrupt this task by clicking on any food item or the cash register, and you will not loose progress if you do interrupt.
Mouse location:

Charles' Candy Shop: Day 8
Today's task is to find the gumballs. The locations are shown below.
There is a GameHouse item located in this level. Location is shown below.
Mouse location/Gumball locations/GameHouse item location:

Charles' Candy Shop: Day 9
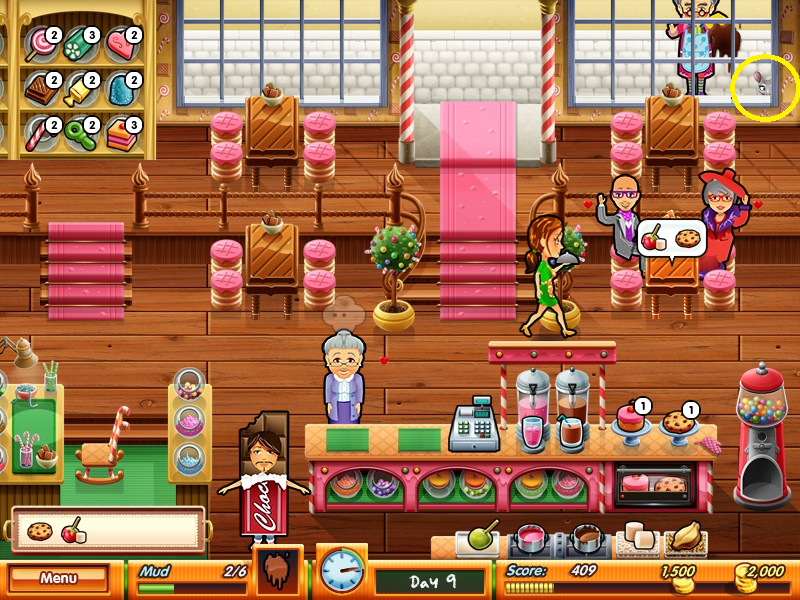
Today's task is to clean the window when mud is thrown at it. Click on the mud splatter, and Charles will go to clean it.
Mouse location:

Charles' Candy Shop: Day 10
Today's task is to serve the child's requests before the timer runs out. Serving her orders in a serving chain will not result in a combo bonus.
Mouse location:


The TV Studio
The TV Studio: Day 1
When the camera man walks to the L-shaped table, click on the table for Emily to follow him. She will then film a commercial, which will take a few seconds. If you wait too long, the camera man will leave and return to his place. You don't have to do the commercials, but if you do, you'll earn 75 points.
To prepare the pizza, first click on the pizza and then the topping. It will not have to bake.
Emily will have to clean tables today, so plan your actions accordingly.
There is a GameHouse item located in this level. The location is marked below.
Mouse location/GameHouse item location:

 The TV Studio: Day 2
Today's task is to sign autographs. When the fan walks down to the restaurant floor there will be a door bell sound; click on him/her and Emily will walk over. Don't wait to long or the fan will leave and you will fail the task.
Emily still has to clean tables today, so plan your actions accordingly.
To prepare a steak, click on it and it will go into the frying pan. When it is done, it will ding. Don't wait too long or it will burn. Once you pick it up from the frying pan, click on whatever seasoning is requested.
Mouse location:

The TV Studio: Day 3
Today's task is to find the keys. Locations are marked below.
Francois will now clean tables.
To make lasagna, click on the lasagna and the desired seasoning, then it will go into the oven. The oven will make a noise when it is baked. Don't leave it too long or it will burn.
To restock the basil, click on the mortar and Emily will refill it. You can have a maximum of four. If you click on anything while Emily is restocking the basil, it will interrupt her.
Mouse location/Key location:

The TV Studio: Day 4
Today's task is to serve the phone customers. When the phone rings, click on it and Emily will answer it. (She will only need to answer the phone once.) Don't wait too long or the caller will hang up and you will fail the task. Prepare the items and click on the phone to serve them before the timer bar runs out. Including the phone food in a chain will not result in a combo bonus.
Fish is cooked the same way as the steaks.
Mouse location:

The TV Studio: Day 5
Today's task is to chase the fan. Click on him when he stops. Don't wait too long or he will walk away and you fail the task.
Prepare the mushrooms the same way as the lasagna.
Restock the chives by clicking the cutting board. You can have a maximum of five. If you click on anything while Emily is restocking, it will interrupt her.
Mouse location:

The TV Studio: Day 6
Today's task is to shoot the commercial after the day ends. (Don't worry if it looks like you won't get expert on this level; the bonus from the commercial will most likely give you the points you need.)
There are six phrases and you must click the matching icon.
1. I'm here to show you Emily's Pasta Light. Orange box.
2. It tastes delicious. Spoon.
3. It's very light. Scale.
4. Delicious Emily's Past Light. Orange box.
5. I love it and I have my own cooking show. Smile.
Ted is available as entertainer now.
Mouse location:

 The TV Studio: Day 7
Today's task is to create the dessert. Click on the curtained area and Emily will walk to it. To interrupt her, simply click on the register or any food item. Keep sending Emily back until the dessert is completed.
Note: You need to make the dessert as quickly as possible because the mouse is hidden behind the curtain. You can't click on him until the curtain is raised, which will happen after the dessert is completed.
Mouse location:

The TV Studio: Day 8
Ted will sometimes drop his microphone when he returns from entertaining. You will have tosend him pick it up.
Mouse location:

The TV Studio: Day 9
Today's task is to walk 2000 yards. Walking done by Emily, Ted and Francois counts toward the total. A good way to do this is to have Emily go back and forth to the tables in between customers.
Mouse location:

The TV Studio: Day 10
Today's task is first to find the clothes that have been dropped (locations marked below) and then to pack them. To pack, click on the suitcase and Emily will go there and begin packing. To interrupt her, click on the register or any food item.

Mouse location:

 Snuggford Fair
Snuggford Fair: Day 1

To make cotton candy, click on the requested color (the machine is on the top left corner of the screen). It will first make a tiny amount, which cannot be served. It will then make a small amount (which can be served), then a large amount. Clicking on the cotton candy add it to your tray; it will be whichever size it was when you clicked. If you don't click as soon as it becomes a large amount, it will revert to a small amount. If you serve a large cotton candy, you get a "supersize bonus" tip of 15 points.

Tip: Customers will use the "Hit-the-Pole" occasionally, earning you 10 points.
You can now check out three customers at a time, so if you didn't earn the "Triple Cash Combo Blast" trophy in Betty's Drive Thru, you easily can at the Fair.
Mouse location:

Snuggford Fair: Day 2
 Today's task is for Emily to sing. Click on the platform and she'll begin to sing. She will need to sing long enough to fill up the meter. To interrupt her, click on the register or any food item. Click on the platform to send her back to sing again.
Balloons are made like the other "pourables" in the game. Click on the appropriate balloon, then click again when the meter is in the green. If you click too late, it will pop and you'll have to do it again.
Mouse location:

Snuggford Fair: Day 3
Today's task is to accept the packages from the mailman. Click on him and Emily will walk over and take the parcel. If you wait too long, Bill will leave and you'll fail the task.
Entertainment is now available with the singing stand. Click on the stand and a customer will go up and begin to sing. Unlike other entertainers, this does not cause customers to gain happiness level but does keep the happiness level from decreasing while the singer is singing.
To make pancakes, click on the bowl of batter. A pancake will then appear on the griddle. When it is cooked, a ding will sound. Click on the finished pancake and then on the appropriate topping.
There is a GameHouse item hidden in this scene.
Mouse location/GameHouse item location:

Snuggford Fair: Day 4
Today's task is to feed the contestants. Serve all their orders before the green timer bar runs out. Including their food in a chain will not result in a combo bonus. You will, however, get the supersize bonus for serving large cotton candy.
To prepare the popcorn, first click on the bowl of popcorn and then on the appropriate seasoning. To restock popcorn, click on the popcorn machine. You can restock the popcorn at any time; you don't have to wait until it is empty.
Mouse location:

Snuggford Fair: Day 5
Today's task is for Ted to interview three couples from Snuggford. When they arrive, you will hear the doorbell sound. Click on them and Ted will go and interview them.
Mouse location:


Snuggford Fair: Day 6
Today's task is to learn the dance. This is a memory game. Francois will show the moves and the corresponding button lights up. Memorize the steps that Francois shows and repeat them, using the right buttons in order.
There is a GameHouse item hidden in this level.
Mouse location/GameHouse item:

 Snuggford Fair: Day 7
Today's task is to give CPR to Francois. This won't occur until after the level is finished. (Don't stress if you haven't gotten expert by the end of this level, as successfully completing this will most likely give you the points you need.) This is the same mini game that has been seen twice before. Click when the moving bar is in the center green area to successfully perform it. You will need to do this six times. If you miss, you will go back down a level. This mini game can be tricky, but just keep trying.
Mouse location:

Snuggford Fair: Day 8
Today's task is to talk with the boy. Answering "No" gains an immediate 500 points. Answering "Yes" causes you to have to chase him to speak with him again and earn points that way. Each time he stops, click on him for Emily to catch him. You must do this quickly or you will fail the task. Either way, he will clean the tables after the task is completed. (I suggest saying "No", it's much easier.)
Mouse location:

Snuggford Fair: Day 9
Today's task is to find all of Maggie's notes. (Locations marked below.)

Mouse location:

Snuggford Fair: Day 10
Today's task is to set up the fireworks. Click on one set and Emily will begin to work on them. Interrupt her by clicking on the register or any food item. Continue to send Emily back to the fireworks between customers until they are completed.
Mouse location:

Delicious: Emily's Taste of Fame is a time management game in which you prepare food and serve it to customers. This game contains an excellent tutorial at the beginning of the first level. If you are an experienced player of the Delicious games, you can skip it, but I advise players less familiar with the Delicious games to play through it. Game hints are also provided, to explain new features. These can be turned off in the settings menu.
Note about exiting the game: For some reason, the only way to exit this game is from the menu while playing a level. If you want to exit from the calendar screen, you will need to hit escape, which puts the game in a smaller window, then hit the "X" in the upper right hand corner of the game screen.
Customers order food and pay for it. When a customer is waiting to pay you will see an image of bills and coins; the coins represent the tip. The higher the customer happiness, the greater the tip. Unfortunately, the customers don't have happiness levels shown by a number of hearts next to them as many other games do, so you have to pay attention to customer facial expressions to know how they are feeling. You will know if a customer has maximum happiness (is ecstatic) because there will be a pulsing heart next to his head. If a customer is angry, his face becomes red. If he becomes furious it is shown by a storm cloud; a furious customer needs to be served immediately or he will leave and you will be penalized -50. .Customers will become impatient and pay lower tips if they have to wait in line behind other customers for too long.
When a customer arrives at the counter to pay, a thought bubble will show a stack of money and a stack of coins. The coins are the tip amount; as a customer decreases in happiness the tip amount will decrease as well.
There is also a +11 bonus for "Two of a Kind", which means checking out or serving two of the same type of customers in a row,
 Entertainers become available eventually in each restaurant. To use an entertainer, click on the entertainer and then the table you want the entertainer to visit. The entertainer will entertain for a few seconds and then that table will gain a heart; you will hear a particular sound that signals that happiness has been gained. Using an entertainer will not prevent a customer from losing a heart.Tip: Using an entertainer is especially helpful when you have a table waiting at the cash register so that you can have two or three tables pay at the same time for the bonus.
 Carl the Mouse will appear in each level. He appears for a few seconds, and you'll know he is there by the chittery-mousy sound that happens each time he shows up. You will be rewarded +100 for clicking on him. If you don't find him right away, he will continue to come back until the end of the level. A screenshot has been provided for each level to show the mouse location. (In some levels you will be able to see the mouse hole and know in advance where the mouse will appear.)
Decorations can be purchased in the shop. You earn $100 for completing the level with the target score and another $100 for completing it with an expert score. There is a different shop for each restaurant. There is a description for each decoration which will tell you what bonus is gained from using it.
Tip: Save your decoration money through the first restaurant, as you won't really need upgrades during this restaurant. Then, you'll be able to purchase all the decorations for the second restaurant at the beginning.
As you play, you will get to know your customers and their level of patience. The overweight customers (know as "Foodies") and the Senior customers have the most patience and can be made to wait so you can make combos. Kids have the least patience.
Doing the same action twice or three times in a row (chaining) will help you achieve higher scores.
Chains can be earned by having two or three orders prepared on your tray, and serving them to the customers without an interruption* to do another task. Serving two customers gets you the a bonus of +11. Unlike other Delicious games, you do not get an extra bonus for serving three in a row.
*Serving customer orders can be interrupted by using the cash register, and the chain will not be broken.
Chaining can also occur when using the cash register. When you check out two customers at the same time, you get a combo bonus for +11, three customers together give a bonus of +20. Note that this is not two customers in a row, but rather at the same time. When customers are ready to pay, they will stand at the counter; wait until you have two or three waiting to pay and one click of the cash register will take care of them all at once.
There is also a +11 bonus for "Two of a Kind", which means checking out or serving two of the same type of customers in a row,
Tip: Plan to serve complete orders only, as doing this will give you a bonus of +5 per table or counter customer.
How to remove an item from you tray, If you make a mistake and put something on your tray that you don't need, click on it and it will be removed from the tray.
Most days have events, which are tasks that need to be performed. If there are multiple parts to the task, a +20 or +25 will be added for each completed part. The fully completed event will give a +100 or +150 to your score. If you don't complete the task, the level can still be won.
Carl the Mouse will appear in each level. He appears for a few seconds, and you'll know he is there by the chittery-mousy sound that happens each time he shows up. You will be rewarded +100 for clicking on him. If you don't find him right away, he will continue to come back until the end of the level. A screenshot has been provided for each level to show the mouse location. (In some levels you will be able to see the mouse hole and know in advance where the mouse will appear.)Decorations can be purchased in the shop. You earn $100 for completing the level with the target score and another $100 for completing it with an expert score. There is a different shop for each restaurant. There is a description for each decoration which will tell you what bonus is gained from using it.
Tip: Save your decoration money through the first restaurant, as you won't really need upgrades during this restaurant. Then, you'll be able to purchase all the decorations for the second restaurant at the beginning.

Most trophies will be earned simply by playing through the game, Here are a few exceptions.
The Panda: Walk 150 miles. You will need to replay some levels to achieve this one.
Break an Egg: Gather all the eggs on one day. See Mo's Farm, Day 2 for a tip.
Show-Biz Burner: Entertain all the customers on a single day. See Betty's Drive Thru, Day 7 for a tip.
?????? "Unlocking this trophy will require you to. .. " See Snuggford Fair, Day 1 for a tip.
Triple Cash Combo Blast: See Betty's Drive Thru, Day 1 for a tip.

There are 10 GameHouse objects hidden throughout the game. If you find all ten, you will receive "the GameHouse Bang" trophy. These items are found in the following levels: Betty’s Drive Thru, Day 4; Betty’s Drive Thru, Day 7; Mo’s Farm, Day 5; Mo’s Farm, Day 7; Mo’s Farm, Day 9; Charles’ Candy Shop, Day 5; Charles’ Candy Shop, Day 8; TV Studio, Day 1; Snuggford Fair, Day 3; Snuggford Fair, Day 6. A screenshot of the location of each item will shown in the walkthough below.

Betty's Drive Thru
Betty's Drive Thru: Day 1
To prepare the burger, click on each piece in order from left to right.
Emily will have to clean the tables today. To clean a table, click on the dirty table and she will walk to it and clean it. Customers won't sit at a dirty table, so you will need to keep them clean to get more customers.
Tip: You don't have to wait until the customers have left to clean a table. An exclamation point will appear over the table when a customer goes to check out, leaving the others at the table. As soon as the exclamation point appears, you can clean the tables--even if there are still customers seated at the table.
Be mindful of the drive-through orders. They will appear above the speaker. To deliver the order, click on the speaker when the order is complete. If you deliver the order before the customer reaches the window, you will get a +50 bonus and the customer will leave money in the window; using the register will pick up the cash. You can leave the money sitting and wait until you have another customer at the register, so as to make a combo. This is a good way to get the "Triple Cash Combo Blast" trophy. If you deliver the food to the customer waiting at the window, you will have to collect their money right then, just as if it were a counter customer.
Mouse location:

Betty's Drive Thru: Day 2
Today's task is to accept the eight packages. When Bill the mailman arrives, a doorbell noise will sound. Click on him for Emily to walk to him and accept the package. Don't wait to long to go to him, or he will leave.
Mouse location:

Betty's Drive Thru: Day 3
Betty is now available to clean tables.
To make waffles, click on the batter bowl. The batter will go into the griddle and sizzle. A bell will ding when the waffle is done. Don't let it cook too long or it will burn. You can cook two waffles at the same time and you can have a maximum of eight in your stack.
To serve a waffle, click on the cooked waffle, then on the appropriate topping.
Mayor Maggie looses her pearls on this level. Click on them to return them too her.
Pearl locations:

Mouse location:

This level introduces "pourable" food. To make the milkshake, click on the banana on the milkshake machine; when the meter's arrow is in the green, click on the machine again. If you wait too late, and the arrow is in the red, you will spill the shake and have to start all over.
This level contains a GameHouse item. Location is shown below.
Your task for this level is to prepare food for Ludwig. Orders will be called out to Emily from the telephone. You must prepare those orders and deliver them to the mailman before the timer runs out. Including these orders in a combo with a regular customer order will not result in the combo point bonus.
Mouse location and GameHouse item location:
 Betty's Drive Thru: Day 5
The task for today is to repair the broken table. Click on the table an Emily will begin to work on it. As she works, the bar fills up, showing the progress. You can interrupt Emily at any time by clicking on a food item or the register. Continue to send Emily back to the table between customers until it is finished.
Mouse location:

Today's task is to follow Francois around for photos. When he stops walking, click on him and Emily will walk over to him. You must do this quickly; if you wait too long, Francois will say "too late" and you'll fail the task.
Mouse location:

Betty's Drive Thru: Day 7
This level contains a GameHouse item. Location shown in screenshot below.
Elvis is now available to entertain customers. To entertain a table, first click Elvis, then the table you want him to entertain. Entertaining customers will increase their happiness by one level. If you have a table of angry customers, you will need to entertain several times to bring them up to happy.
Tip: Since the restaurant is not very busy yet, this is a good level to earn the Show-Biz Burner trophy for entertaining every table.
Betty is flustered today, and keeps dropping her cleaning cloth when she goes to clean tables. When this happens, click on the dropped cloth. She will pick it up and return to her place. You will have to click on the table again for her to go and clean it.
Mouse location/GameHouse item location:

The task for this level is to perform the Heimlich on Bill the mailman. Click when the moving bar is in the center green area to successfully perform it. You will need to do this six times. If you miss, you will go back down a level. This mini game can be tricky, but just keep trying.
Mouse location:

Betty's Drive Thru: Day 9
Emily is tired today, so chocolates are provided to give her an energy boost. When she gets tired during the day, click on the chocolates, and she will eat one and speed up. You can also have her eat one without her being tired. If you don't use them all by the end of the day, you fail the task.
Customers can now sit on the stools at the counter. They can be entertained if need be.
Mouse location:

Betty's Drive Thru: Day 10
There are chocolates available again today. She'll not request one, so you can have her eat one at any time or not at all.
There are two tasks today. One is to give Mo the tools he requests and the other is to have Betty clean the rug when Mo gets it dirty. The location of the tools is shown below. To clean the rug, just click on it and Betty will walk over to it.

Mouse location:


Mo's Farm: Day 1
To make milk products, click on the churn. After one turn churning, click and you will have a bottle of milk. After two turns churning, click and you will have porridge (or whey?). After three turns churning, click and you will have butter. You will see the items sitting on the stool as they are produced. Just have Emily keep churning until the right product is reached. Each product uses one level of the milk. To refill the milk, click on the cow. Emily will walk to her and begin to milk her. You can interrupt the milking at any time by clicking on a food item or the cash register.
Emily will have to clean tables today.
Mouse location:

Mo's Farm: Day 2
Today's task is to comfort Belle the cow. She won't produce any milk until she is calm, but customers won't order any milk products until she does produce. To calm her, click on her and Emily will walk over and begin to soothe her. Continue to do this throughout the day.
Eggs are now available. The hen will cluck and then you'll hear a plopping sound as the egg is laid. Click on it to pick it up. It will go to your tray, so only pick them up if you need them. The eggs will only stay on the grass for a short time before disappearing.
Tip: There is a trophy (Break an Egg) to be earned for picking up all the eggs on one level. This is a good level to do this, as the restaurant is still rather slow. Just delete it from your tray (by clicking on it on the tray) right after you pick it up so that you'll not fill up your tray.
Emily still has to clean the tables, so plan accordingly.
Mouse location:

Mo's Farm: Day 3
Today's task is to find the blueberries. Locations are marked below.

Apples are now available. They will grow on the tree, three at a time. To pick them, click on one and Emily will pick them. They will regrow. You can stock a maximum of 12.
Tashi will clean tables now.
Mouse location:
 Mo's Farm: Day 4
Today's task is to feed the party. Take them all the food requested before the meter runs out. Including these orders in a chain will not result in a combo bonus.
Jam is now available. To make jam, first click the jar and then the apple.
It takes two apples to make jam.
Mouse of location:

Today's task is to chase the dog. When he stops at a location, click on him to send Emily over to him. If you don't do this quickly, you will fail the event. After you complete the task, he will be available to act as entertainer.
To make a pie, click on the pie plate (located in the oven) and then the apples. It takes three apples to make one pie. It will then be available as four slices. The pie will not make any particular sound to let you know when it is baked, but will blink. You must pay attention to the pie, because if you leave it too long, it will burn.
There is a GameHouse item hidden in this level.
Mouse location/GameHouse item:

Mo's Farm: Day 6
Today's task is to serve six golden eggs. When the hen lays one (there will be a special noise to let you know), pick it up and give it to the next customer to order an egg.
Note: If you have a regular egg and a golden egg on your tray, the regular egg will be served first.
Cherries are now available and are used the same way as the apples.
Mouse location:

Mo's Farm: Day 7
Today's task is to accept the packages. When the delivery man arrives, click on him and Emily will get the package. If you wait too long, the delivery man will leave.
A GameHouse item will be in this level. The hen will lay an orange egg with white polka dots somewhere on the farm. This is what it looks like:
Mouse location:

Mo's Farm: Day 8
Today's task is to fill Charles' milk bucket. When he brings the bucket, click on it and Emily will walk to it and begin to fill it. The bucket will flash green when it is full; click on it then. If you click too soon or too late (when the bucket is red), you'll fail the task.
Mouse location:

Mo's Farm: Day 9
Today's task is to talk to Francois. The doorbell noise will sound and an exclamation point will appear over his head. Click on him and he'll reminisce.
There is a GameHouse item located in this level. Location is marked below.
Mouse location/GameHouse item location:

Mo's Farm: Day 10
Today's task is to train Tashi how to run the farm. Tashi will ask Emily a question such as "can you teach me how to prepare jam?". When she does, send Emily to do whatever Tashi requests.
Tip: If the milk container is full when she asks Emily to milk the cow, you'll need to use up some milk first.
Mouse location:


Charles' Candy Shop: Day 1
Emily will have to clean tables today.
Customers can order one, two or three gumballs. Gumballs are prepared by clicking on the gumball machine. One click gives a bag a one, click a second time and a second gumball will go in the bag and click a third time for a third gumball.
To refill the candy jars, click on Charles and he'll walk to them and refill them. The jars can hold a maximum of three pieces.
Mouse location:

Charles' Candy Shop: Day 2
Emily will have to clean tables today.
To make the candy apples, click on the ingredients from left to right. (More ingredients will be available later.)
The task for today is to catch up with the twins. When one of them stops, click on them and Emily will catch her. Don't wait too long to chase the twins or you will fail the task.
Mouse location:

Charles' Candy Shop: Day 3
Emily is still cleaning tables today.
The task today is to make Emily walk 1000 yards. To do this, have her walk from table to table (by clicking on any table, empty or full) in between preparing food.
To refill the cakes, just click on the oven. It will beep when the cake is done--don't leave it too long or it will burn--and will refill your stack to three cakes.
Mouse location:

Charles' Candy Shop: Day 4
Today's task is to collect the packages from the mailman. Click on him when he comes into the store and Emily will receive the package. Don't wait too long to click on him or the mailman will leave and you'll fail the task.
Charles will clean the tables from now on. He will still fill the candy jars, too.
There are two candy choices for apples now, so pay attention to your order.
Mouse location:

Charles' Candy Shop: Day 5
"I heard you learned how to run a restaurant from your Uncle Antonio." Yes.
"You're stranded here because your car broke down, right?" No.
"Your friend Francois usually travels with you, right? Is it true you've decorated ten restaurants together?" No.
Note: If you wait too long to serve him or answer his questions, you will fail the task.
Cookies are now available and are restocked like the cakes. Note that when you click on the oven to restock, it bakes both and refills both cake and cookie to a stack of three.
There is a GameHouse item hidden in this level. Location is marked below.
Mouse location/GameHouse item location:

Charles' Candy Shop: Day 6
Today's task is to fix the tables. Click on the table and Emily will begin to repair it. Click on any food item or the cash register to interrupt her. Keep sending her back to the tables in between customers. You will want to repair them quickly so as to have enough tables for customers.
There is now another topping option for the candy apples, so look closely at the order.
Francois is available as an entertainer now.
Mouse location:

Charles' Candy Shop: Day 7
Today's task is to stack the boxes. This is done the same way as the CPR task in Betty's Drive Thru: Day 8. Click when the moving bar is in the center green area to successfully stack a box. You will need to do this six times. If you miss, you will go back down a level. It can be enormously frustrating, but keep trying. You can interrupt this task by clicking on any food item or the cash register, and you will not loose progress if you do interrupt.
Mouse location:

Charles' Candy Shop: Day 8
Today's task is to find the gumballs. The locations are shown below.
There is a GameHouse item located in this level. Location is shown below.
Mouse location/Gumball locations/GameHouse item location:

Charles' Candy Shop: Day 9
Today's task is to clean the window when mud is thrown at it. Click on the mud splatter, and Charles will go to clean it.
Mouse location:
Charles' Candy Shop: Day 10
Today's task is to serve the child's requests before the timer runs out. Serving her orders in a serving chain will not result in a combo bonus.
Mouse location:


The TV Studio
The TV Studio: Day 1
When the camera man walks to the L-shaped table, click on the table for Emily to follow him. She will then film a commercial, which will take a few seconds. If you wait too long, the camera man will leave and return to his place. You don't have to do the commercials, but if you do, you'll earn 75 points.
To prepare the pizza, first click on the pizza and then the topping. It will not have to bake.
Emily will have to clean tables today, so plan your actions accordingly.
There is a GameHouse item located in this level. The location is marked below.
Mouse location/GameHouse item location:

Today's task is to sign autographs. When the fan walks down to the restaurant floor there will be a door bell sound; click on him/her and Emily will walk over. Don't wait to long or the fan will leave and you will fail the task.
Emily still has to clean tables today, so plan your actions accordingly.
To prepare a steak, click on it and it will go into the frying pan. When it is done, it will ding. Don't wait too long or it will burn. Once you pick it up from the frying pan, click on whatever seasoning is requested.
Mouse location:

The TV Studio: Day 3
Today's task is to find the keys. Locations are marked below.
Francois will now clean tables.
To make lasagna, click on the lasagna and the desired seasoning, then it will go into the oven. The oven will make a noise when it is baked. Don't leave it too long or it will burn.
To restock the basil, click on the mortar and Emily will refill it. You can have a maximum of four. If you click on anything while Emily is restocking the basil, it will interrupt her.
Mouse location/Key location:

The TV Studio: Day 4
Today's task is to serve the phone customers. When the phone rings, click on it and Emily will answer it. (She will only need to answer the phone once.) Don't wait too long or the caller will hang up and you will fail the task. Prepare the items and click on the phone to serve them before the timer bar runs out. Including the phone food in a chain will not result in a combo bonus.
Fish is cooked the same way as the steaks.
Mouse location:

The TV Studio: Day 5
Today's task is to chase the fan. Click on him when he stops. Don't wait too long or he will walk away and you fail the task.
Prepare the mushrooms the same way as the lasagna.
Restock the chives by clicking the cutting board. You can have a maximum of five. If you click on anything while Emily is restocking, it will interrupt her.
Mouse location:

The TV Studio: Day 6
Today's task is to shoot the commercial after the day ends. (Don't worry if it looks like you won't get expert on this level; the bonus from the commercial will most likely give you the points you need.)
There are six phrases and you must click the matching icon.
1. I'm here to show you Emily's Pasta Light. Orange box.
2. It tastes delicious. Spoon.
3. It's very light. Scale.
4. Delicious Emily's Past Light. Orange box.
5. I love it and I have my own cooking show. Smile.
Ted is available as entertainer now.
Mouse location:


Today's task is to create the dessert. Click on the curtained area and Emily will walk to it. To interrupt her, simply click on the register or any food item. Keep sending Emily back until the dessert is completed.
Note: You need to make the dessert as quickly as possible because the mouse is hidden behind the curtain. You can't click on him until the curtain is raised, which will happen after the dessert is completed.
Mouse location:

The TV Studio: Day 8
Ted will sometimes drop his microphone when he returns from entertaining. You will have tosend him pick it up.
Mouse location:

The TV Studio: Day 9
Today's task is to walk 2000 yards. Walking done by Emily, Ted and Francois counts toward the total. A good way to do this is to have Emily go back and forth to the tables in between customers.
Mouse location:

The TV Studio: Day 10
Today's task is first to find the clothes that have been dropped (locations marked below) and then to pack them. To pack, click on the suitcase and Emily will go there and begin packing. To interrupt her, click on the register or any food item.

Mouse location:


Snuggford Fair: Day 1

To make cotton candy, click on the requested color (the machine is on the top left corner of the screen). It will first make a tiny amount, which cannot be served. It will then make a small amount (which can be served), then a large amount. Clicking on the cotton candy add it to your tray; it will be whichever size it was when you clicked. If you don't click as soon as it becomes a large amount, it will revert to a small amount. If you serve a large cotton candy, you get a "supersize bonus" tip of 15 points.

Tip: If you buy the "Hit-the-Pole" in the shop, click on it to send Emily over. Have her hit it until she makes it ding and you'll earn the "?????" trophy. The trophy will be called "?Mystery Ding?" after you earn it.
Tip: Customers will use the "Hit-the-Pole" occasionally, earning you 10 points.
You can now check out three customers at a time, so if you didn't earn the "Triple Cash Combo Blast" trophy in Betty's Drive Thru, you easily can at the Fair.
Mouse location:

Snuggford Fair: Day 2
Today's task is for Emily to sing. Click on the platform and she'll begin to sing. She will need to sing long enough to fill up the meter. To interrupt her, click on the register or any food item. Click on the platform to send her back to sing again.Balloons are made like the other "pourables" in the game. Click on the appropriate balloon, then click again when the meter is in the green. If you click too late, it will pop and you'll have to do it again.
Mouse location:

Snuggford Fair: Day 3
Today's task is to accept the packages from the mailman. Click on him and Emily will walk over and take the parcel. If you wait too long, Bill will leave and you'll fail the task.
Entertainment is now available with the singing stand. Click on the stand and a customer will go up and begin to sing. Unlike other entertainers, this does not cause customers to gain happiness level but does keep the happiness level from decreasing while the singer is singing.
To make pancakes, click on the bowl of batter. A pancake will then appear on the griddle. When it is cooked, a ding will sound. Click on the finished pancake and then on the appropriate topping.
There is a GameHouse item hidden in this scene.
Mouse location/GameHouse item location:

Snuggford Fair: Day 4
Today's task is to feed the contestants. Serve all their orders before the green timer bar runs out. Including their food in a chain will not result in a combo bonus. You will, however, get the supersize bonus for serving large cotton candy.
To prepare the popcorn, first click on the bowl of popcorn and then on the appropriate seasoning. To restock popcorn, click on the popcorn machine. You can restock the popcorn at any time; you don't have to wait until it is empty.
Mouse location:

Snuggford Fair: Day 5
Today's task is for Ted to interview three couples from Snuggford. When they arrive, you will hear the doorbell sound. Click on them and Ted will go and interview them.
Mouse location:


Snuggford Fair: Day 6
Today's task is to learn the dance. This is a memory game. Francois will show the moves and the corresponding button lights up. Memorize the steps that Francois shows and repeat them, using the right buttons in order.
There is a GameHouse item hidden in this level.
Mouse location/GameHouse item:

Today's task is to give CPR to Francois. This won't occur until after the level is finished. (Don't stress if you haven't gotten expert by the end of this level, as successfully completing this will most likely give you the points you need.) This is the same mini game that has been seen twice before. Click when the moving bar is in the center green area to successfully perform it. You will need to do this six times. If you miss, you will go back down a level. This mini game can be tricky, but just keep trying.
Mouse location:

Snuggford Fair: Day 8
Today's task is to talk with the boy. Answering "No" gains an immediate 500 points. Answering "Yes" causes you to have to chase him to speak with him again and earn points that way. Each time he stops, click on him for Emily to catch him. You must do this quickly or you will fail the task. Either way, he will clean the tables after the task is completed. (I suggest saying "No", it's much easier.)
Mouse location:

Snuggford Fair: Day 9
Today's task is to find all of Maggie's notes. (Locations marked below.)

Mouse location:

Snuggford Fair: Day 10
Today's task is to set up the fireworks. Click on one set and Emily will begin to work on them. Interrupt her by clicking on the register or any food item. Continue to send Emily back to the fireworks between customers until they are completed.
Mouse location:

In the first level of the game, I caught the mouse, but on the calendar for day 1 in Betty's diner, it doesn't show that I caught it. Is this a bug in the game?
ReplyDeleteI don't know; could be. Did you try playing the level a second time? I wish I could help! You can always contact the Delicious team through their Facebook page. They have been quick to respond for me.
DeleteI can't find all 10 gamehouse obje3cts I only find 9. Help please
ReplyDeleteI've got a section, up toward the top of this walkthrough, that tells which levels each object is on. Then, you can check the screenshot of that level to see where it is located--it will be circled.
DeleteI know this is several years too late, but maybe it was Mo's farm, Day 5, which requires the kitchen upgrade in order to appear. I only published this in the event someone else should need to see this.
DeleteThanks for the tip!
DeleteAnytime...better late than never :)
Deletewhere do i find the firework parts in emilys taste of fame to get the fat lady firework i found one not sure how n where i found it please help i have went to every calendar and the days kept clicking i couldnt find them
ReplyDeleteI just saw this; sorry for taking so long to respond.
DeleteThe fireworks are not found in parts, they are trophies earned. If you hover over the place in the trunk, it will tell you what to do to earn the trophy. There is a section towards the top of the walkthrough that explains how to get some of the harder ones.
Hi ☺️.I don't know if you remember this game but the collectible items throughout the game for example in level 4 a picture I think does not appear neither upgrade the kitchen neither not .I'm using a tablet not PC
ReplyDeleteYeah, the PC version is very different from the mobile, I'm sure. It's quite old and was made way before the collectible items. Game House has their own blog; maybe they have a walkthrough for the newer version. (This is one of my ultimate favorites; I replay it a lot!)
DeleteActually I check gamehouse official site and they did not have anything on this .so I'm gonna search it again
DeleteThis is definitely the best game in the series. I replayed it recently and loved it...UNTIL the end of the game where that kid blew up Francois with fireworks. I had forgotten about that part. It bugged me when I first played the game and it bugged me again this time. When Emily showed any anger at the kid for what he did, the game forced us to give him a pass because "he's just a kid." I know it's just a game, but we spend so much time with these characters that it's hard not to get involved in the story. This kid was adult enough to figure out how to light fireworks that didn't belong to him (Why did Emily put them right next to the walkway, anyway?) So he was adult enough to take a little scolding for his behavior. I hated that they made us chase him around apologizing when HE was the one that was wrong! If you don't give kids consequences, the bad behavior gets worse every time. This particular kid deserved a major punishment and maybe even a visit to the police station. Sorry to rant but this always irritated me because it nearly killed an otherwise great storyline.
ReplyDeleteI can see how it's irritating!
DeleteIt's one of my favorites, too!
ReplyDelete