

 Dr. Cares is a time management game that centers around pet care. If you have played any of the Delicious or Fabulous games, you will have a good idea of how it works. If not, be sure to play the excellent tutorial at the beginning of the first level.
Customers order and pay for products. When a customer is waiting to pay you will see an image of bills and coins. The higher the customer happiness, the greater the price paid. Customers with three coins next to the money stack are ecstatic and are paying the highest amount. When a customer becomes mad, no coins will be beside the money. A very angry customer will have a thunder cloud beside their head.
Doing the same action twice or three times in a row (combo or chain) will help you achieve higher scores. Combos can be earned by having two or three orders prepared on your tray, and serving them to the customers without an interruption to do another task. If you serve two in a row, you get a bonus of +10 and a bonus of +15 for three customers in a row. Checking out two in a row gets a bonus of +15; three in a row will gain a bonus of +30. Clean two stations in a row for a bonus of +10; cleaning three in a row earns a bonus of +15. You will earn a bonus of +10 for serving a complete order of two or three products to a customer. There is also a "clean clinic" bonus of +100 that can be earned at the end of the level if all your stations are clean or being cleaned before you check out your last customer.
How to remove an product from your tray: If you make a mistake and put something on your tray that you don't need, click on it and it will be removed from the tray.
The score for the story levels is measured in one, two, or three stars, depending on the amount of points you earn. You will win the level as long as you earn one star. The challenge levels have a set amount that must be met, without the option of earning more than one star.
Tip: If you can't reach three stars on a level, you can change the difficulty to a lower setting under the main menu and retry the level.

In some locations, Newton the bird can entertain your pet customers and give them more happiness. To entertain, click on Newton, then on the pet you want entertained. There is a trophy (Party! Party!) to be earned for Newton entertaining 100 pets.
Jack:
In other locations, Jack will be available to entertain.

Mini Games
Many of the medical actions performed will require a mini game. The first time the game occurs, there is a walk through of it. The faster you complete the mini game, the more tip you will earn.
You will earn the trophy Master Vet for getting the highest score (3 coins) on each mini game.
Challenges and Challenge Levels:
All levels have a challenge to be completed, and there are challenge levels to complete. Challenges don't have to be completed in the regular story levels, but add points if you do complete it. Each challenge completed, whether in a challenge level or story level, earns a diamond.
Tip: Sometimes you can't both complete a challenge and get three stars in a story level. If this happens, you can play the level twice: once to complete the challenge and once to reach three stars.
The Mouse:
The mouse will appear in every story level. He will make a squeaky sound, and will appear for a few seconds. Clicking on him will give you a bonus 100 points. I have included a screen shot of his location for every level.
Upgrade Screen
Each location has an upgrade screen which appears before each level. Here you can buy upgrades of your equipment. Click on the object and it will tell what bonus the upgrade will give.
Upgrade money comes from winning the levels: +50 for each star earned on each story level.
You will earn a trophy (Shopping Spree) for purchasing all the upgrades.
Tip: You can complete the first clinic without needing all the upgrades, so save your money for the second location and you can buy most of the upgrades right at the beginning.

Diamonds are earned for completing each challenge and are used to buy items for Newton. To access the diamond page, click on the diamond in the upper right hand corner of the level map. You will earn the "*BWAAH*" trophy for buying all the gifts.

Trophies are earned for various actions, most of which will occur simply by playing through the game.
Purrfect is earned by making 25 "purrfect" combos. A purrfect combo occurs when you check out four or more customers at a time.
Chapter 1: Arthur's Clinic
Level 1:
Challenge: Keep the customers happy.
To restock the dog treats, click on the box on the lower right hand side. You can have a maximum of three bags stocked.
Mouse Location:

Level 2:
Lisa will clean tables now.
Challenge: Take care of Daisy. Give her what she requests before the color runs out of the thought balloon.
To make the injections, click first on the needle, then on the bottle.
Mouse Location:

Challenge 1:
Challenge: Catch 12 mice. They will pop up in various locations, but it is easy enough to find them. More than needed will appear, so if you miss one, don't stress.
Level 3:
Challenge: Send the job applications. Click on the lap top when the exclamation point appears over it. You can interrupt this at any time by clicking on an object or the register. Just be sure to send Amy back to the lap top in between customers until the task is completed.
Mouse Location:

Level 4:
Challenge: Find the turtles. The turtle will make a noise when it appears. Here are the locations where they will appear:

To make the collar, click on all three parts from left to right.
Mouse Location:

Challenge 2:
Challenge: The tray slowly breaks, giving less and less space to carry items.
Level 5:
Challenge: Diagnose Scrappy by giving him what he requests before the color runs out of the thought balloon.
There are now two colors of injection available, so pay close attention to the order.
There are now two charms available for collars.
Mouse Location:

Level 6:
Challenge: Don't let Newton disturb Arthur. When Newton flies in, click on him to shoo him away.
Mouse Location:

Challenge 3
Challenge: Customers come in large waves.
Level 7:
Challenge: Keep checking Scrappy's iv. Don't let the meter run out--click on him often.
Mouse Location:

Level 8:
Challenge: Clean up the clinic by finding the hidden items. Locations are marked below.

Mouse Location:

Challenge 4
Challenge: Alternate between counter and table customers.
Level 9:
Challenge: Get 20 combos, chains, or bonuses.
Mouse Location:

Challenge 5
Challenge: Don't remove any items from your tray.
Tip: If you pick up a wrong item, just leave it on your tray. You will not loose the challenge for having something on your tray at the end of the level.
Level 10:
Challenge: Help Amy make her decision by clicking on the notebook when the exclamation point appears. Be sure to click before the color runs out of the thought bubble.
Mouse Location:

Chapter 2: Pawsitive Clinic
Level 11:
Challenge: Serve customers within 20 seconds of each other. Serving includes checking out and grooming. The timer in the upper right hand corner will show how much time you have.
To entertain pets, click on Jack and then on the pet you wish to entertain.
Restock the perfume from the box under the counter.
Mouse Location:

Challenge 6
Challenge: Serve the VIPs first. The VIPs are the ones in black suits.
Tip: When you have two VIPs at one time, first serve the one that ordered first.
 Level 12:
 Challenge: Get 3 quick bonuses in a row.
Tip: Don't wait for serving combos, just serve quickly until you complete the challenge.
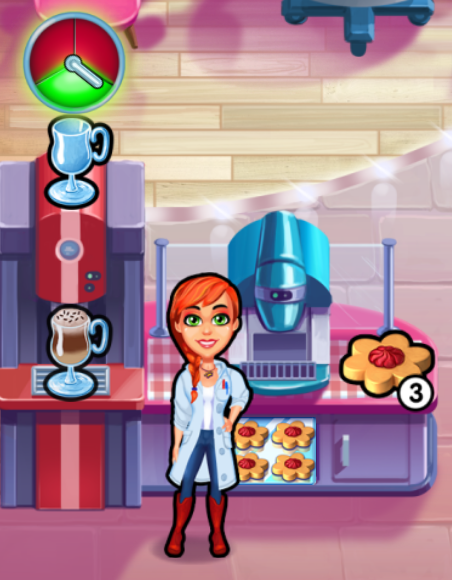
To make the drink, click on the cup. When the meter hand is in the green, click on it again. Then, click on the cookie. The cookies will need to be restocked. Click on the pan of cookies to restock them.
Mouse Location:

Level 13:
Challenge: Dye the puppy pink by giving him the shampoo when he requests it.
To make the bow, click first on the purple bow, then on the blue gem three times. Bows will need to be restocked from the box below the counter. You can have a maximum of 6 at a time.
Mouse Location:

Challenge 7
Challenge: The score needed is higher than usual; reach it by getting extra points for entertaining pets.
Level 14:
Challenge: Amy is tired. She will request coffee; be sure to get it for her before the color runs out of the thought bubble.
A second color of gem is available for bows, so pay attention to the order.
Mouse Location:

Level 15:
Challenge: Clean the messes. Click on the areas with the exclamation point. You can interrupt Amy's cleaning by clicking on any item or the register. Just be sure to send her back to clean in between customers.
Mouse Location:

Challenge 8
Challenge: Serve the mouse his requests before the color runs out of the thought balloon.
Level 16:
Challenge: Entertain at least 8 pets. Click on Jack, then on the pet you want entertained.
There are now 3 gem color choices, so pay close attention. Bows can also be ordered with each colored gem; to prepare this, click on each color from left to right.
Mouse Location:

Level 17:
Challenge: Keep the phone off; click on it when the exclamation point appears. Be sure to click on it before the color runs out of the thought bubble.
Mouse Location:

Challenge 9
Challenge: Don't make the same product twice in a row.
Tip: If you need to make 2 of something, just make something else in between and delete what you don't need.
Level 18:
Challenge: Dye the puppy again by taking it shampoo when requested.
Mouse Location:

Level 19:
Challenge: Don't run out of stock of anything (perfume, cookies or bows).
Mouse Location:

Challenge 10
Challenge: After a few seconds, the customer's order will no longer be visible; you'll need to memorize the order.
Level 20:
Challenge: Write the grocery list by clicking on the notepad. You can interrupt Amy at any time by clicking on an object or the register, just be sure to send her back in between customers to finish the list.
Mouse Location:

Chapter 3: Critical Care
Level 21:
Challenge: Get 10 quick bonuses.
To prepare the medicine bottles, click on it 3 times. To restock, click on the cabinet in the back of the room.
Mouse Location:

Challenge 11
Challenge: Use only one slot on the tray.
Level 22:
Challenge: Clean the ward and unpack the boxes. You can interrupt Amy at any time by clicking on an item or the register, just be sure to send her back in between patients.
There are two colors of IVs available now.
Mouse Location:

Level 23:
Challenge: Give Maggie a check up by clicking on her when the exclamation point appears. Be sure to click before the color runs out of the thought bubble.
To make the disinfectant, click first on the cotton ball, then the bottle.
Mouse Location:

Challenge 12:
Challenge: Serve complete orders only.
Level 24:
Challenge: Make sure Newton doesn't cause trouble by clicking on him as soon as he appears.
To get lab results, click on the petri dish, then the microscope.
Mouse Location:

 Level 25:
 Challenge: Make sure the tables are clean when the level ends.
To make an x-ray, click on the black film sheet. When the meter hand reaches green, click again. If you let it go into the red after the green, the x-ray is over exposed and has to be done over.
There are three types of medicines now and they may be requested as a variety; click on each one from left to right.
Mouse Location:

Challenge 13
Challenge: Mini games are harder for this level.
Level 26:
Challenge: Get the first star in the first half of the level.
Mouse Location:

Level 27:
Challenge: Make sure everyone leaves happy.
Mouse Location:

Challenge 14
Challenge: Don't waste anything by deleting it from your tray or having it still on your tray at the end of the level.
Level 28:
Challenge: Keep checking on Maggie; don't let the meter run down to zero.
Mouse Location:

Level 29:
Challenge: Clean up after the surgery by finding the hidden items. Locations marked below.

Mouse Location:

Challenge 15
Challenge: Customers are in a bad mood.
Tip: Remember to use Jack to entertain table patients.
Level 30:
Challenge: Don't over expose any x-rays. (See level 25.)
Mouse Location:

Chapter 4: Animal Shelter
Level 31:
Challenge: Get 20 combos, chains, or bonuses.
Restock the cans from the box under the register.
To serve the dry pet food, click on the bowl and then the food. To restock the bowls, click on the dirty ones, then the sink, to wash them.
Mouse Location:

Challenge 16
Challenge: You can only have 2 items stocked at a time.
Level 32:
Challenge: Find the puppy; she will come out at various locations, marked below.

Mouse Location:

Level 33:
Challenge: Entertain 8 pets with Newton.
To make pet beds, click on the 3 pieces from left to right.
For the pet bath, click on the brush and then the shampoo.
Mouse Location:

Challenge 17
Challenge: Amy is very tired and walks slowly.
Level 34:
Challenge: Give Crystal what she requests.
There are two colors of dry food available now, so pay close attention.
There are two colors of shampoo available now, so check the order closely.
Mouse Location:

Level 35:
Challenge: Clean the exam tables and tub within 10 seconds of the pets leaving.
There are two colors of beds available now.
Water can be requested in addition to food. Use the faucet next to the dry pet food.
Mouse Location:

Challenge 18
Challenge: Catch 20 mice
Level 36:
Challenge: Don't run out of canned food or pet bowls.
Mouse Location:

Level 37:
Challenge: Check the kitten's IV: don't let the meter run down to 0%. Click on the kitten regularly between customers.
Mouse Location:

Challenge 19
Challenge: Only happy customers give points toward the score. Chain and bonuses don't add points.
Level 38:
Challenge: Don't pick up a product that has not been ordered.
Mouse Location:

Level 39:
Challenge: Clean up the locations with an exclamation point. You can interrupt Amy at any time by clicking on an item or the register.
Mouse Location:

Challenge 20
Challenge: The tray slowly breaks until it only has 1 slot.
Level 40:
Challenge: Write the list. Click on the register or an item to interrupt Amy.
Mouse Location:

Chapter 5: Horse Stable
Level 41:
Challenge: Give Ash what she requests.
The hay will need to be restocked by clicking first on the bag, then on the haystack.
Mouse Location:

Challenge 21
Challenge: Walk 800 yards.
Tip: Send Amy back and forth between the hay bags and the register in between customers.
Level 42:
Challenge: Don't leave items on the tray for more than 10 seconds. This means you won't be able to chain your orders; just deliver them quickly.
Helmets are restocked from the shelves at the back of the stable.
Mouse Location:

Level 43:
Challenge: Check out three angry customers.
Tip: You can tell when a customer is angry, because their face turns red and there is a storm cloud beside them. I let one stall customer get angry at a time, while I took care of all the others.
To make a saddle, click the blanket, then the saddle, then the stirrups. Blankets are restocked from the pile above the hay bags.
Mouse Location:

Challenge 22:
Challenge: Get the biggest combo 3 times.
Tip: The "biggest combo" means a "purrfect" combo, by checking out four customers in a row.
Level 44:
Challenge: Clean the three spots in the stable.
Mouse Location:

Level 45:
Challenge: Earn the first star in the first half of the day.
Mouse Location:

Challenge 23:
Challenge: Serve the stall customers first.
Level 46:
Challenge: Keep Sherman away from Ash by clicking on him as soon as he comes into the stable.
Mouse Location:

Level 47:
Challenge: Play with Maggie by clicking on her when the exclamation point appears; be sure to click before the color runs out of the thought bubble.
Mouse Location:

Challenge 24
Challenge: Get more than $350 in tips.
Tip: Though it says "tips", it actually means chain/combo bonuses. Check out multiple customers in a row, clean the stalls in a row, and serve customers in a chain.
Tip: The only way to complete this challenge is to get multiple "purrfect" combos by checking out 4 customers at a time.
Level 48:
Challenge: Give the horse what it requests.
Mouse Location:

Level 49:
Challenge: Keep the stalls clean so that no one has to wait for a stall.
Mouse Location:

Challenge 25:
Challenge: Serve only full orders.
Level 50:
Challenge: Find the awards. Locations marked below.

Mouse Location:

 Chapter 6: Arthur's Clinic
Level 51:
Challenge: Check out 20 ecstatic customers (these are customers with a heart).
Restock the pet bowls from the box.
Fill the pet food box the same way as the drinks early in the game. After the meter is in the green, click on it again, then the box lid, then the ribbon.
Mouse Location:

Challenge 26
Challenge: Serve customers in the order they arrive.
Level 52:
Challenge: Don't stay still for more than 10 seconds. The timer in the upper right will help you to know when to make her move.
Tip: You can always click on the register, the pet bowl box, or an item you don't need to make her move. (Delete items from your tray by clicking on them.)
Mouse Location:

Level 53:
Challenge: Clean up the clinic by clicking on the three items with exclamation points. You can interrupt Amy by clicking on an item or the register.
The pet chips need to be made by clicking on the chip capsule, then the machine. To take a chip capsule to a patient, click the lit up capsule and the red machine to combine them.
Mouse Location:

Challenge 27
Challenge: Don't delete anything from the tray.
Level 54:
Challenge: Accept the boxes from Crystal.
Mouse Location:

Level 55:
Challenge: Deliver Scrappy's requests before the color runs out of the thought bubble.
Mouse Location:

Challenge 28
Challenge: Use only 3 slots on the tray.
Level 56:
Challenge: Get 10 quick bonuses.
Mouse Location:

Level 57:
Challenge: Click on the computer to send the invitations. Amy can be interrupted by clicking on the register or an item.
Mouse Location:

Challenge 29
Challenge: Customers are in a bad mood.
Tip: Use Newton to raise their happiness, and therefore their tips.
Level 58:
Challenge: Give away the turtles. Customers will come to the door and request them. Be sure to click on the turtle, then the customer, before the color runs out of the thought balloon.
Mouse Location:

Level 59:
Challenge: Set up for the party by clicking on the 3 exclamation points. Interrupt Amy by clicking on an item or the register.
Mouse Location:

Challenge 30
Challenge: Get 3 stars on every mini game in the level.
Level 60:
Challenge: Click on the list when the exclamation point appears; be sure to click before the color runs out of the thought bubble.
Mouse Location:

I'm having issues with the dog/cat tip games at the Shelter levels. How do you work on an iPad?
ReplyDeleteSo sorry, but I've only played it on PC, so I can't help. You could ask on their Facebook page; the developer has been quick to respond.
Deletehttps://www.facebook.com/DrCaresGame/
I am trying to get the trophy master vet(the blood pressure cuff) how do I know what level I need to play to get this
ReplyDeleteThere really isn't a way that I know of, other than to replay each minigame until you get three coins on each one. My guess is that if you play the last level of each location, you'll encounter each minigame of that level. Sorry I can't be of more help!
DeleteOlá, amigo!
ReplyDeleteAcabei de baixar esse jogo <3
Estou gostando MUITO, ainda estou na primeira clínica, mas eu adoro animais. Além de que o design e as mecânicas são como os jogos antigos da Emily, eu amo isso.
I really liked it, too, except I am not fond of the mini-games.
DeleteAcabei de terminar o jogo, amigo. Gostei bastante dele, depois jogarei a continuação. Obrigada pela ajuda <3
DeleteGlad I could help!
Delete