

Amber's Airline--7 Wonders is a time management game that plays a lot like the Heart's

Passengers arrive with hearts over their heads. The more hearts, the happier the passenger. Doing tasks quickly will add to their hearts. If they wait too long, they will lose hearts. You need to earn a certain number of hearts each level to achieve the score needed. A passenger will earn a golden heart if they are completely happy. Passengers with golden hearts will not lose happiness.
Tip: Let your golden heart passengers wait at the check out until you have several to check out at once; that way you get bonus hearts.
Some tasks will have green bubbles; perform these before the color runs out to keep the customer happy and to earn a quick bonus.
Some tasks will have blue bubbles. These have a minigame that must be played to complete the task. Be sure and click on the customer before the color runs out to keep her happy and to earn a quick bonus.
Some tasks have purple bubbles. These require you to perform an action such as clicking or dragging the mouse.
Doing the same action twice or three times in a row (combo or chain) will help you achieve higher scores. Checking two passengers out at a time will give you a +10 bonus; checking out three will give a +15; you will get even more points the more you check out at a time.
Tip: You can only have 5 passengers waiting at the checkout.
Bonus levels are included. They do not advance the story and do not have to be played, but will give diamonds if you do.
There is an upgrade shop that appears before levels. You earn money to purchase items in the shop by achieving stars on the levels. The items in the shops will give various bonuses. Hoover over the item to see what it will do.
Tip: You can pass the first chapter without buying from the upgrade shop. Save your money to be able to buy the upgrades right at the beginning of Chapter 2.

Carl the mouse appears in every story level. I have provided a screenshot of his location for each one.
He makes a squeaky sound when he appears. He will appear throughout the level, if you don't find him when he first appears. You will get a trophy for finding him in every level.

Trophies are earned in the form of entries in Amber's diary. Most will be earned by playing through the game.
Our Mystery Machine: There is a mistake in the game that says you need 67 upgrades for the trophy, but there are only 66 available.
Perfect Partnership: Find the 7 Wonders Tour logo in each location: You need to click on the logo one time per chapter, plus once in the plane. It is always on the blue cloth covering the check out table, except in the plane where it is under the check out register.
 |
| In the Airplane |
 |
| In the 7 Wonder Locations |
 |
| In the Snuggford Airport |

Note: There is a mistake in the game and you won't have enough diamonds to purchase the final item.
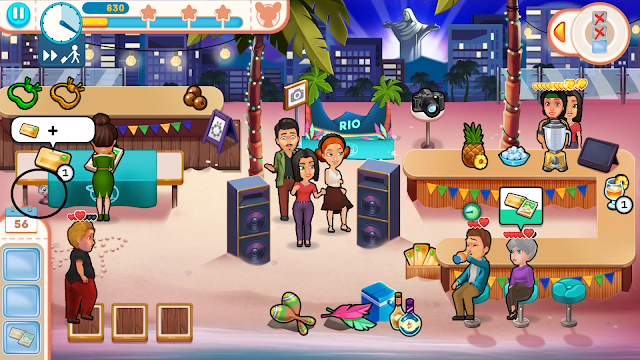
Chapter 1: Rome
Level 1:
This challenge is to achieve at least one star.
To serve food, click on the tray, then on the food.
When the passenger has this request, they are asking to be sent to the display boards.


Mouse location:

Level 2:
This challenge is to make 3 trays.
Mouse location:

Level 3:
This challenge is to text Angela when the exclamation point appears over the phone.
When passengers request this icon, they are asking for the information map.


To make the gelato, click on the cone, then twice on the gelato.
Restock the brochures from the box next to the gelato cart.
The camera is to the left of the broken columns.
Mouse location:

Challenge 1:
This challenge is to find as many mice as possible to reach the highest score. Each mouse is worth +25. They will pop up everywhere, but are easy to spot.
Level 4:
This challenge is to make a second map. Click on the box and Amber will start to make it. You can interrupt her at any time by clicking on a passenger or item. Be sure and return her to it until it is finished.
The other brochures that can be requested are laying on the table near the gelato cart.
Mouse location:

Challenge 2:
This challenge is that the items are hidden and you must click on them to put them back in place. Locations marked below.

Level 5:
This challenge is to get 17 quick services.
Mouse location:

Level 6:
This challenge is to have 5 passengers with golden hearts.
Mouse location:

Challenge 3:
This challenge is that passengers only ask for stations, no products.
Tip: Do not speed up the passengers, or you'll get stuck with passengers needing stations that aren't free.
Level 7:
This challenge is to talk to Karen when the exclamation point appears over her.
Mouse location:
This challenge is that passengers only ask for stations, no products.
Tip: Do not speed up the passengers, or you'll get stuck with passengers needing stations that aren't free.
Level 7:
This challenge is to talk to Karen when the exclamation point appears over her.
Mouse location:

Level 8:
This challenge is to find the objects spilled. Locations marked below.

Mouse location:

Challenge 4:
This challenge is to reach the score goal by playing only minigames.
Level 9:
This challenge is to give gelato to the crew members.
Mouse location:

Challenge 5:
This challenge is that passengers forget what they ordered, and all their thought bubbles will show is a question mark. If you forget what was ordered, don't worry -- the order will appear again if the passenger is not served in a few seconds.
Level 10:
This challenge is to prevent the passengers from reading the newspaper by clicking on them when the exclamation point appears.
This challenge is to prevent the passengers from reading the newspaper by clicking on them when the exclamation point appears.
Mouse location:

Chapter 2: Taj Mahal
Level 11:
This challenge is to get 5 quick services for table passengers.
This challenge is to get 5 quick services for table passengers.
Trays have to be restocked from the ones next to the display boards.
Mouse location:

Level 12:
This challenge is to make 3 service combos.
This challenge is to make 3 service combos.
Trays now get dessert. First click the meal, then the dessert.
Mouse location:

Level 13:
This challenge is that you can't run out of elephant keyrings.
To make the food bowls, click first on the empty bowl, then on the rice or the chickpeas.
This challenge is that you can't run out of elephant keyrings.
To make the food bowls, click first on the empty bowl, then on the rice or the chickpeas.
Mouse location:


Challenge 6:
This challenge is to click on as many mice as possible.
This challenge is to click on as many mice as possible.
Level 14:
This challenge is to receive the postcards by clicking on the postman when he comes in the scene.
This challenge is to receive the postcards by clicking on the postman when he comes in the scene.
Mouse location:

Pay close attention to the requested post card in the post card minigame. Some look the same but have different writing.

Challenge 7:
This challenge is to play as Pamela.
This challenge is to play as Pamela.
Level 15:
This challenge is to walk 500 yards.
Tip: Amber will not walk that much on her own, so you'll need to send her to different chairs when she is not needed so that she will walk enough.
This challenge is to walk 500 yards.
Tip: Amber will not walk that much on her own, so you'll need to send her to different chairs when she is not needed so that she will walk enough.
Pay close attention to the requested post card in the post card minigame. Some look the same but have different writing.
Mouse location:


Level 16:
This challenge is to pick up the postcards. Locations marked below.

This challenge is to pick up the postcards. Locations marked below.

Mouse location:


Challenge 8:
This challenge is that the bar will mess up and need to be repaired. Click on it for Amber to repair it. She will work until it is fixed.
This challenge is that the bar will mess up and need to be repaired. Click on it for Amber to repair it. She will work until it is fixed.
Level 17:
This challenge is to earn 12 hearts with the henna minigame.
Tip: You'll need to earn 3 hearts every time you play it.
Food bowls now get spice added. Click the spice bag after you click the bowl and the food.
This challenge is to earn 12 hearts with the henna minigame.
Tip: You'll need to earn 3 hearts every time you play it.
Food bowls now get spice added. Click the spice bag after you click the bowl and the food.
Mouse location:


Level 18:
This challenge is to text Madelyn.
This challenge is to text Madelyn.
Mouse location:


Challenge 9:
This challenge is to earn points only from minigames.
This challenge is to earn points only from minigames.
Level 19:
This challenge is to refill the elephant keychain and/or the Taj Mahal snowglobe 16 times. Tip: You'll not have that many to order them, so you'll need to put them on your tray and delete them.
This challenge is to refill the elephant keychain and/or the Taj Mahal snowglobe 16 times. Tip: You'll not have that many to order them, so you'll need to put them on your tray and delete them.
Mouse location:


Challenge 10:
This challenge is that the passengers only ask for stations.
Tip: Do not speed up the passengers, or you'll get stuck with passengers needing stations that aren't free.
This challenge is that the passengers only ask for stations.
Tip: Do not speed up the passengers, or you'll get stuck with passengers needing stations that aren't free.
Level 20:
This challenge is to look for the diary by clicking on the exclamation point when it appears.
This challenge is to look for the diary by clicking on the exclamation point when it appears.
Mouse location:


Chapter 3: Great Wall of China
Level 21:
This challenge is to talk with Clark when the exclamation point appears.
Level 21:
This challenge is to talk with Clark when the exclamation point appears.
Mouse location:


Level 22:
This challenge is to earn 12 hearts at the globe minigame.
Tip: You'll have to earn 3 stars each time you play.
This challenge is to earn 12 hearts at the globe minigame.
Tip: You'll have to earn 3 stars each time you play.
Mouse location:


Level 23:
This challenge is to keep Elise's kids from leaving by clicking on her son when the exclamation point appears.
This challenge is to keep Elise's kids from leaving by clicking on her son when the exclamation point appears.
Mouse location:


Challenge 11:
This challenge is to find as many mice as possible.
This challenge is to find as many mice as possible.
Level 24:
This challenge is to get 10 quick services.
This challenge is to get 10 quick services.
Mouse location:


Challenge 12:
This challenge is that a VIP passenger has a large amount of requests.
This challenge is that a VIP passenger has a large amount of requests.
Level 25:
This challenge is to find a wedding venue for Karen by using the phone. Click on the exclamation point and Amber will begin to work. You can interrupt her at any time by clicking on a station or item. Be sure and send her back to finish.
This challenge is to find a wedding venue for Karen by using the phone. Click on the exclamation point and Amber will begin to work. You can interrupt her at any time by clicking on a station or item. Be sure and send her back to finish.
Mouse location:


Level 26:
This challenge is to reassure Karen. You'll see a green bar over her head. Click on her for Amber to talk with her and the bar will reset to full. If you let the bar run out of green, you will lose the challenge.
This challenge is to reassure Karen. You'll see a green bar over her head. Click on her for Amber to talk with her and the bar will reset to full. If you let the bar run out of green, you will lose the challenge.
Mouse location:


Challenge 13:
This challenge is that the items are hidden and you must click on them to put them back in place. Locations marked below.
Note: There will only be 3 waters and 2 of each mask in this level. Passengers will not ask for more than those, however.

This challenge is that the items are hidden and you must click on them to put them back in place. Locations marked below.
Note: There will only be 3 waters and 2 of each mask in this level. Passengers will not ask for more than those, however.

Level 27:
This challenge is to prepare 6 cups of tea. I had enough passengers to order, and didn't have to make any extras.
Mouse location:


Level 28:
This challenge is to find the masks. Locations marked below.
Mouse location:


Challenge 14:
This challenge is to reach the needed score by playing only minigames.
Level 29:
This challenge is that you cannot remove any item from your tray.
Mouse location:


Challenge 15:
This challenge is that there is only one slot on the tray.
Level 30:
This challenge is to text when the exclamation point appears over the phone.
Mouse location:


Chapter 4: Snuggford Airport
Level 31:
This challenge is to get 6 "quick service" bonuses from the passengers in the chairs.
Note: Bonuses from the passengers on the bar stools do not count.
Note: Bonuses from the passengers on the bar stools do not count.
Mouse location:


Level 32:
This challenge is that you can't run out of food trays.
Tip: Always restock after you use one.
To make coffee, click on the cup. When the meter hand is in the green, click on it again. If you wait too long, the cup will overflow.
Tip: Always restock after you use one.
To make coffee, click on the cup. When the meter hand is in the green, click on it again. If you wait too long, the cup will overflow.
Mouse location:


Level 33:
This challenge is to receive the 3 boxes.
To refill the bins, get them from the stack to the upper right.
To refill the fingerprint paper, get it from the box to the middle left.
To refill the bins, get them from the stack to the upper right.
To refill the fingerprint paper, get it from the box to the middle left.
Mouse location:


Level 34:
This challenge is to read the newspapers. Click on Adrian for him to start. Click on any item or station to interrupt him.
Mouse location:


Challenge 17:
This challenge is that the lights will go out regularly. Fix it by clicking on the exclamation point.
Level 35:
This challenge is to speak with the journalist on the phone by clicking on it when the exclamation point appears.
Mouse location:


Level 36:
This challenge is to earn 12 hearts with the x-ray minigame.
Tip: You get 6 chances to play the game, so you don't have to earn 3 each time.
Tip: You get 6 chances to play the game, so you don't have to earn 3 each time.
Mouse location:


Challenge 18:
This challenge is that passengers forget what they ordered, and all their thought bubbles will show is a question mark. If you forget what was ordered, don't worry -- the order will appear again if the passenger is not served in a few seconds.
Level 37:
This challenge is to only carry 1 item at a time, even though you have 3 slots.
Tip: Two plastic bins only count as 1 item.
The scanner has to be charged to be used. Click on it and when the lights turn green, it's ready.
Tip: Turn it on after you use it, so that it will be ready when you need it.
Tip: Two plastic bins only count as 1 item.
The scanner has to be charged to be used. Click on it and when the lights turn green, it's ready.
Tip: Turn it on after you use it, so that it will be ready when you need it.
Mouse location:


Level 38:
This challenge is that you can only take 30 seconds or less TOTAL for all the minigames in the level. The meter in the upper right will tell you how much time you have left.
Mouse location:


Challenge 19:
This challenge is to play minigames for the score.
Level 39:
This challenge is to compare the handwriting by clicking on the books when the exclamation appears.
Mouse location:


Challenge 20:
This challenge is that the items are hidden and you must click on them to put them back in place. Locations marked below.

Level 40:
This challenge is to analyse the camera records by clicking on the monitor until the meter is full. You can interrupt him at any time by clicking on a station or item.
Mouse location:


Chapter 5: Lost City of Petra
Level 41:
This challenge is to get 10 service combos.
Mouse location:


Level 42:
This challenge is to walk less than 600 meters.
Tip: Make service chains to keep her steps fewer.
Mouse location:


Level 43:
This challenge is to receive the candles.
Rugs need to be stocked from the basket next to the sandwiches.
To make the sandwiches, click on the water bottle first, then the sandwich. You can store 3 at a time.
To make the backpack, click first on the backpack, then the sandwich/water combo.
Rugs need to be stocked from the basket next to the sandwiches.
To make the sandwiches, click on the water bottle first, then the sandwich. You can store 3 at a time.
To make the backpack, click first on the backpack, then the sandwich/water combo.
Mouse location:


Challenge 21:
This challenge is to click on the mice.
Level 44:
This challenge is to build the information point.
Tip: The sooner you get it built, the sooner you can use it!
Backpacks now contain a map. Click the backpack, water/sandwich, then the map.
Tip: The sooner you get it built, the sooner you can use it!
Backpacks now contain a map. Click the backpack, water/sandwich, then the map.
Mouse location:


Level 22:
This challenge is to play as Karen.
Level 45:
This challenge is to keep Fabio away from Pamela by clicking on the exclamation point when he appears.
Mouse location:


Level 46:
This challenge is to talk with the camel when the exclamation point appears.
The audio guide has to be charged before it can be given to a passenger. Click on it and when the red button has turned green, it is charged.
Tip: Always recharge when you pick it up, so that it will be ready the next time.
The audio guide has to be charged before it can be given to a passenger. Click on it and when the red button has turned green, it is charged.
Tip: Always recharge when you pick it up, so that it will be ready the next time.
Mouse location:


Challenge 23:
This challenge is that the passengers are moving fast.
Level 47:
This challenge is to get 12 hearts in the sand minigame.
Note: You will have to earn 3 stars each time you play.
Note: You will have to earn 3 stars each time you play.
Mouse location:


Level 48:
This challenge is to find the relics. Locations marked below.


Mouse location:


Challenge 24:
This challenge is to play the minigames.
Level 49:
This challenge is for Amber to take a break. When the exclamation point appears, click on in, then do the action required.
Mouse location:


Challenge 25:
This challenge is that the items will rearrange each time the sandstorm blows.
Level 50:
This challenge is that you can not delete any items from your tray.
Mouse location:


Chapter 6: Christ the Redeemer
Level 51:
This challenge is to serve the food in less than 5 seconds. You need to do this 8 times.
Tip: There is no timer to let you know how long you have, so just serve the food immediately, and don't try for service chains.
The tablet has to be charged before it can be given to a passenger.
Tip: Take a second to recharge it every time you remove it, so that it will be charged when you need it.
Mouse location:


Level 52:
This challenge is to keep Pamela from feeling sad. You'll see a green bar over her head. Click on her for Amber to talk with her and the bar will reset to full. If you let the bar run out of green, you will lose the challenge.
Mouse location:


Level 53:
This challenge is to make 12 service chains.
To make the cocktail, click on the pineapple, then the ice. When the meter hand is in the green, click again. You can store up to 3 cocktails at once.
To make the necklace, click the cord, then the beads.
To make the cocktail, click on the pineapple, then the ice. When the meter hand is in the green, click again. You can store up to 3 cocktails at once.
To make the necklace, click the cord, then the beads.
Mouse location:


Challenge 26:
This challenge is to find as many mice as possible.
Level 54:
This challenge is to take the photos when the exclamation point appears.
Mouse location:


Challenge 27:
This challenge is to play as Pamela.
Level 55:
This challenge is to dance with Pamela when the exclamation point appears.
Mouse location:


Level 56:
This challenge is that you can't have more than one item on the tray at a time.
Tip: If you have trouble reaching 3 stars because of the challenge, play it twice: once to earn the challenge, and once ignoring the challenge and making serving chains.
Tip: If you have trouble reaching 3 stars because of the challenge, play it twice: once to earn the challenge, and once ignoring the challenge and making serving chains.
Mouse location:

Challenge 28:
This challenge is that passengers only ask for stations, no products.
Tip: Do not speed up the passengers, or you'll get stuck with passengers needing stations that aren't free.
Level 57:
This challenge is to serve 10 passengers in a minute.
Note: I'm not really sure what this challenge is -- is it 10 served within 1 minute of each other or 10 served all together in a minute or less or. . . -- but I served quickly and got 10 easily.
Note: I'm not really sure what this challenge is -- is it 10 served within 1 minute of each other or 10 served all together in a minute or less or. . . -- but I served quickly and got 10 easily.
Mouse location:


Level 58:
This challenge is that you cannot pick up the same item twice in a row.
Tip: If you have two passengers to order the same thing, pick up something you don't need in between the two, and then just delete it from your tray.
Tip: If you have two passengers to order the same thing, pick up something you don't need in between the two, and then just delete it from your tray.
Mouse location:


Challenge 29:
This challenge is to play the minigames.
Level 59:
This challenge is to accept the deliveries.
Mouse location:


Challenge 30:
This challenge is that some passengers will ask for products from previous levels. Just click on them and Amber will take care of it.
Level 60:
This challenge is to clean the 8 sets of cups. Locations below.


Mouse location:


Hey! Can you tell me what the pink hearts are about?
ReplyDeletePassengers arrive with hearts over their heads. The more hearts, the happier the passenger. Doing tasks quickly will add to their hearts. If they wait too long, they will loose hearts. You need to earn a certain number of hearts each level to achieve the score needed. A passenger will earn a golden heart if they are completely happy. Passengers with golden hearts will not loose happiness. Hope that helps! :)
DeleteI apologize, I said pink hearts, but I meant the pink stars we accumulate for getting over what is required in the scores. We also get a free 1.5 added at the end of every level. �� I'm sorry for the confusion.
DeleteSo when will they fix the fact that you can't get all the outfits with the diamonds? Do they know it is a current problem?
ReplyDeleteI am not affiliated in any way with the developers, producers, or sellers of these games, so I have no answer for you. Perhaps you could contact Gamehouse?
DeleteHow do you get the ending for the game? I beat all 60 levels and got the diamond for each. After I finished level 60, I just tapped continue and it went back to the map. Am I missing something? Do I need to purchase all the outfits, get all trophies and find all the mice?
ReplyDeleteThank you in advance
Hi there! I still lack one diamond myself (those blasted mice!), but was able to watch the end scenes. Are you playing on PC (like I am) or on a phone platform? It sounds like some sort of glitch. If you are playing on PC, you can delete and reinstall the game (PCs generally save the game so that you don't loose any progress doing this) and see if that works for you. Otherwise, I don't have any ideas! If all else fails, I think the publisher, GameHouse, has video walkthoughs on you tube; you might could see if they show the story scenes on those.
DeleteWhat are the big single stars on each level?
ReplyDeleteDo you mean the stars at the top left over the points-meter? If so, those are the three levels of the score that you can earn. If not, could you describe to me where they are, using one of my screenshots.
DeleteI completed the game and yet cannot purchase last outfit item. Says I need 2 more stars but have completed and won each level and challenge PLEASE fix this
ReplyDeleteSorry you are having problems! Unfortunately, this is an independent blog, not affiliated with the developers, producers, or sellers of these games, so I can't fix it for you. Did you contact help at GameHouse? They are, I believe, the creators of the game.
DeleteI don't know if this page is still active? I am replaying the game, and I think what "unknown" meant was the star in the middle of each map. Does it do anything? Also how do we know that clicking the logo has worked, should we get a reward? Mine doesn't seem to do anything. Thanks x
ReplyDeleteAre you playing on PC? I didn't have any stars. :( As for the logo, yes you should still get the trophy Perfect Partners when you've clicked them all. :)
DeleteThanks for the reply. On the maps for each level visited, there is a big star in the centre of the map, (on Android). Also, when I click on the logo, nothing happens, so I don't know if it is registering that I have found it.
DeleteI played the PC version, and there were no stars. I wonder if the Android version has something different with the stars? I tried to Google an answer for you, but couldn't find any site with the Android version. So sorry!
DeleteAlso, if I'm remembering right, nothing did happen when I clicked on the logo, until I clicked the last one and then got notified of the trophy.
Sorry I can't be of more help!
I wasn’t sure how to tell you, the creator, but I use your guides all the time and I love them and very rarely do I find a mistake but on level 26 you have loose instead of lose
ReplyDeleteI'm glad they are helpful! And thanks for catching that -- I'm a TERRIBLE speller! XD
DeleteEstou um pouco atrasada, sei que esse jogo ja saiu faz tempo, mas descobri sobre os diamantes que falta pra comprar todas as roupas. Joguei pelo celular, então ao finalizar, voltei ao menu inicial e lá em baixo onde tem o botão pra jogar, assinar, etc. tem um ícone do "original stories". Quando vc finaliza tudo, aparece nesse icone "+3 diamentes" vc clica nesse icone, aparece a propaganda e quando você fecha e retorna pro jogo tem os 3 diamantes para comprar o sapato que falta!
ReplyDeleteThanks for the information! Hopefully that will help people using the phone version. For the fully purchased computer version, though, I don't think the problem was ever fixed. :(
DeleteThe challenge that requires you to spend less than 30 seconds in mini-games is nearly impossible for me to complete. Almost every person requires some kind of extra screening and there is usually a bit of a delay after completing each mini-game. I complete the mini-game and it takes several seconds before it goes back to main game. I believe they are counting those extra seconds, which makes it extremely difficult to complete the challenge. Going to try to slow down and take less customers and hope that works. Already achieved the 3 stars so just want the diamond!
ReplyDeleteI remember that being really hard. Also, when I played it, there was a mistake in the game which left you with one diamond too few.
Delete